Transmission Fluid Cooler Upper Pipe Assembly Replacement
Transmission Fluid Cooler Upper Pipe Assembly Replacement
Removal Procedure
1. Recover the refrigerant from the A/C system. Refer to Refrigerant Recovery and Recharging.
2. Raise and support the vehicle. Refer to Vehicle Lifting.
3. Remove the right front fascia closeout panel.
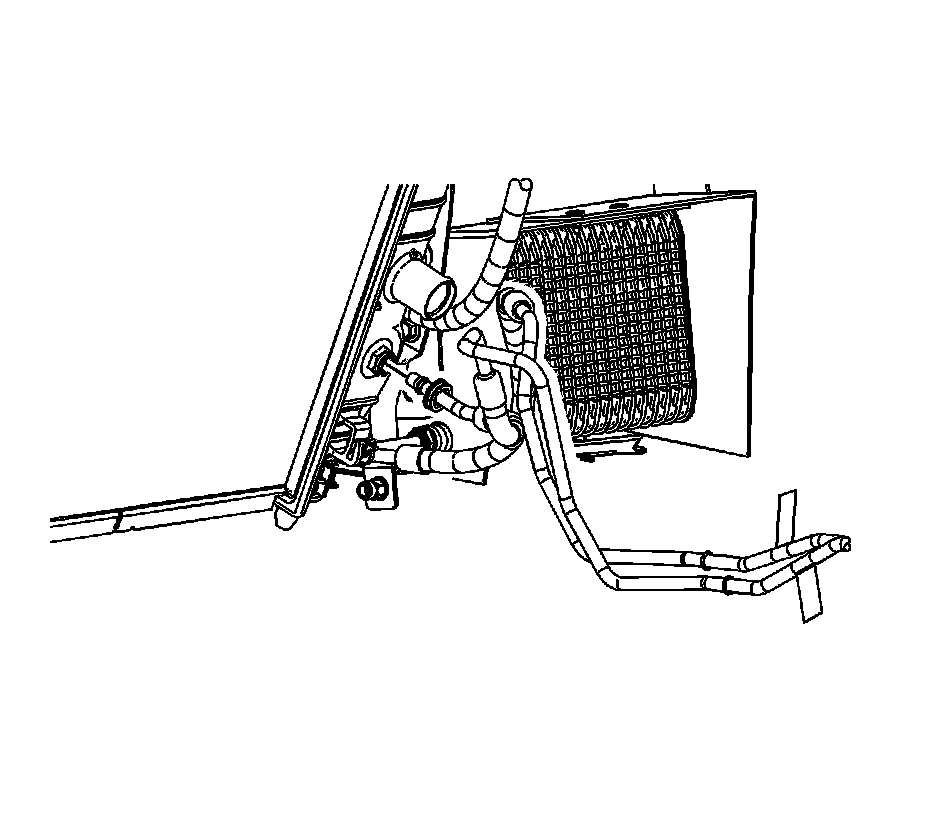
4. Disconnect the lower transmission oil cooler (TOC) line from the radiator.
5. Remove the lower TOC line from the radiator.
6. Remove the A/C compressor.
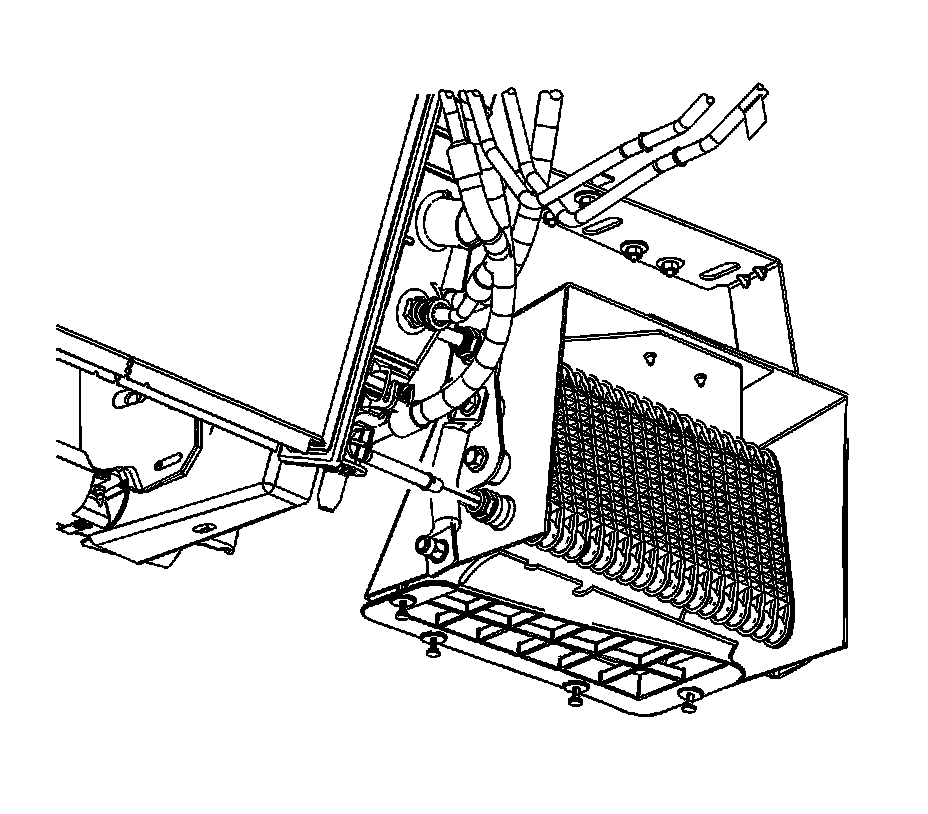
7. Disconnect the lower TOC line from the auxiliary TOC.
8. Remove the lower TOC line from the auxiliary TOC.
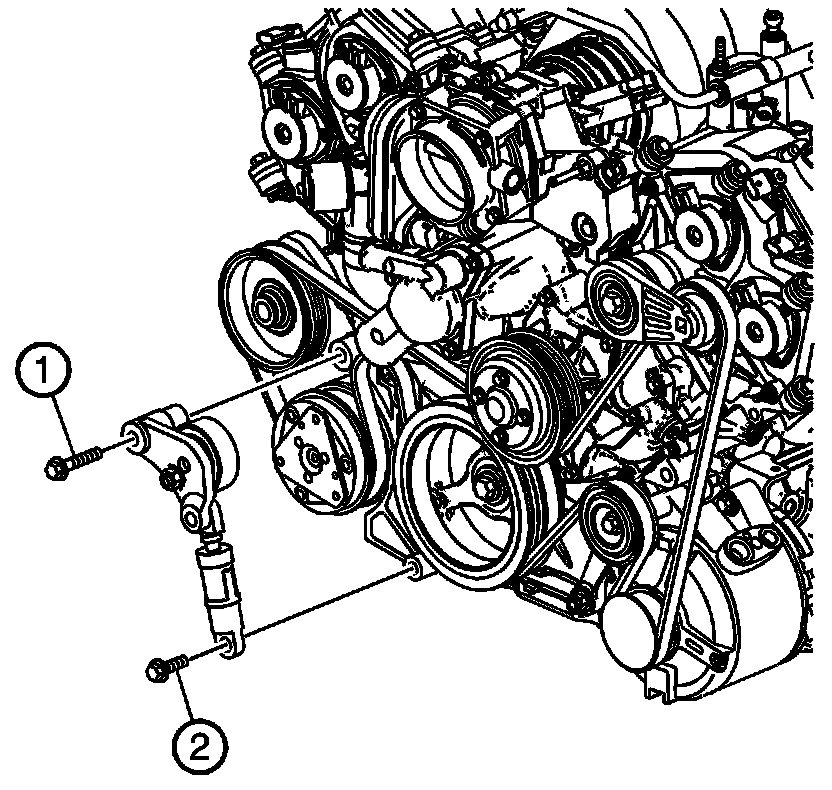
9. Remove the accessory belt tensioner top bolt (1).
10. Remove the accessory belt tensioner lower bolt (2).
11. Remove the accessory belt tensioner.
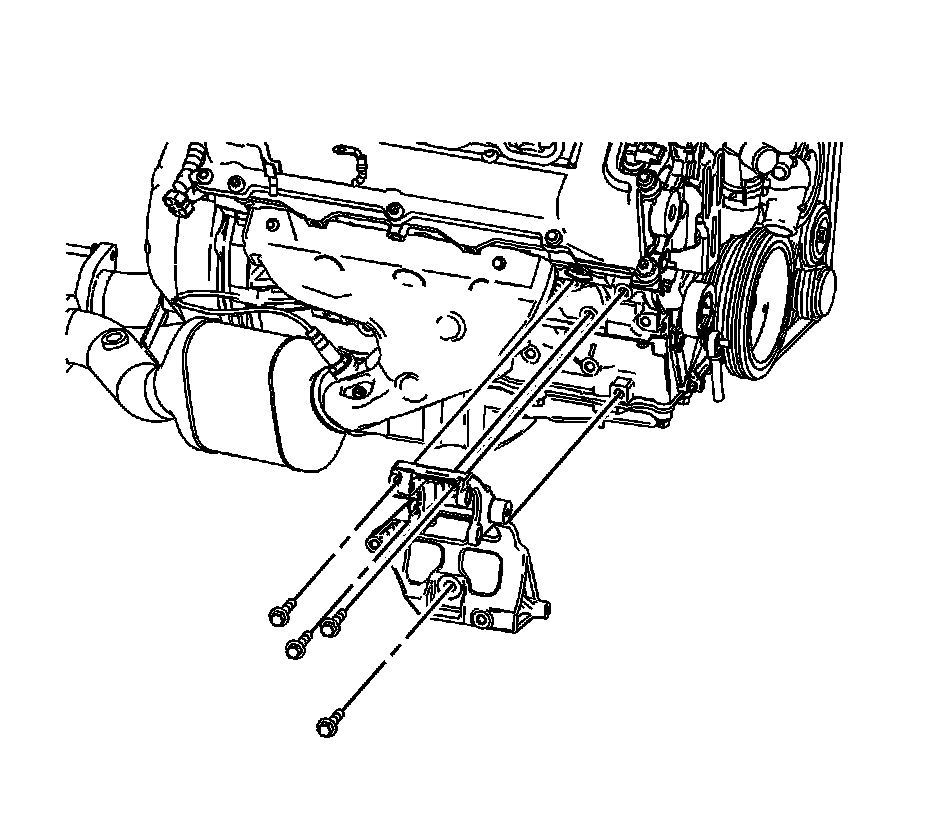
12. Remove the A/C compressor and power steering pump bracket bolts.
13. Remove the A/C compressor and power steering pump bracket.
14. Raise the engine cradle back into position.
Important: It is not necessary to fully tighten the cradle nuts to specification at this time. They will be removed again at a later step. Tighten until the cradle mounting nuts contacts the engine cradle.
15. Install the RH cradle mounting nuts.
16. Remove the support jacks from beneath the vehicle.
17. Lower the vehicle.
18. Install the engine support fixture.
19. Raise the vehicle approximately 0.61 m (2.0 ft) off the ground.
20. Support the engine cradle with a jack stands.
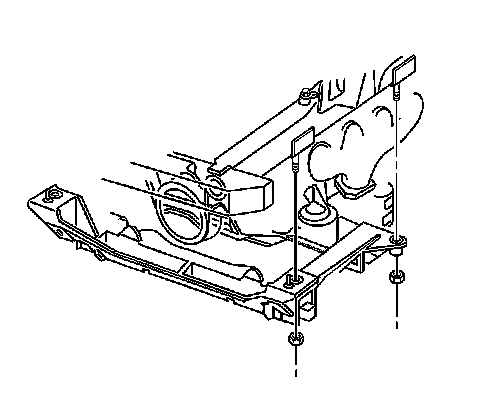
21. Remove the RH cradle mounting nuts.
22. Lower the RH engine cradle assembly approximately 0.375 in (51.0 mm)
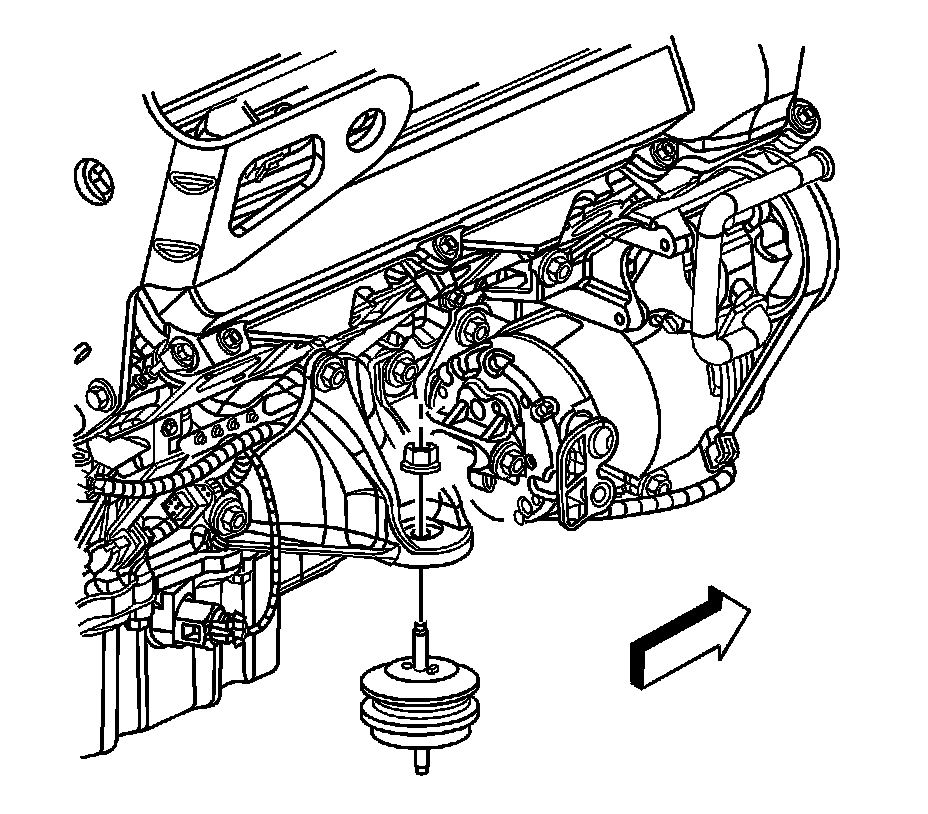
23. Remove the RH engine mount upper nut.
24. Remove the RH engine mount lower nut
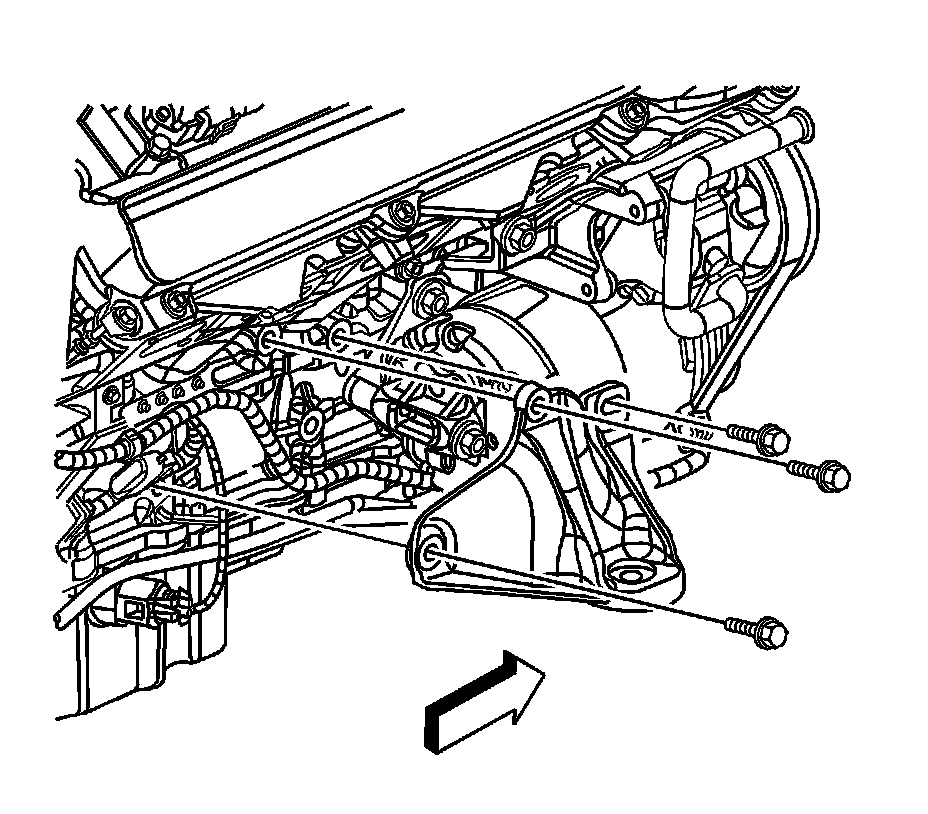
25. Remove the RH engine mount bracket bolts.
Important: It is necessary to elevate the engine assembly slightly to allow clearance for the RH engine mount bracket removal.
26. Using the J 28467-B, raise the engine assembly approximately 0.75 in (19.0 mm) to remove RH engine mount bracket
27. Remove the RH engine mount bracket.
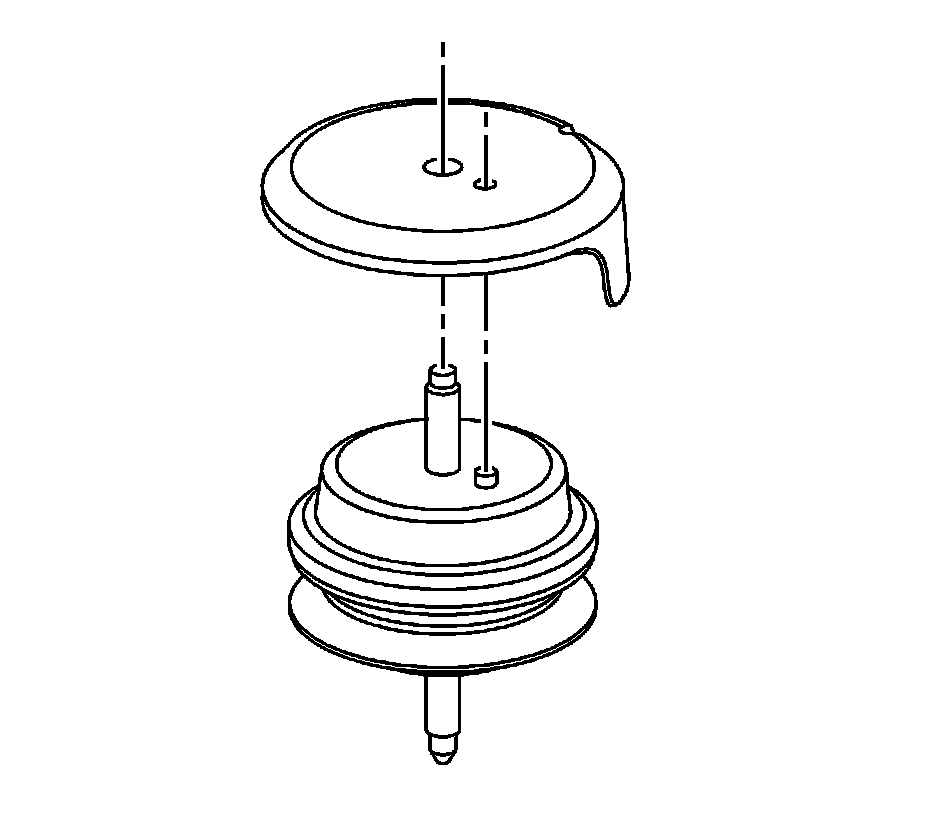
28. Remove the RH engine mount heat shield from the engine mount.
29. Remove the RH engine mount.
30. Raise and support the vehicle.
31. Remove the TOC line to oil pan retaining nuts.
32. Remove the TOC line to oil pan retaining clips.
33. Disconnect the upper and lower TOC retainer clip.
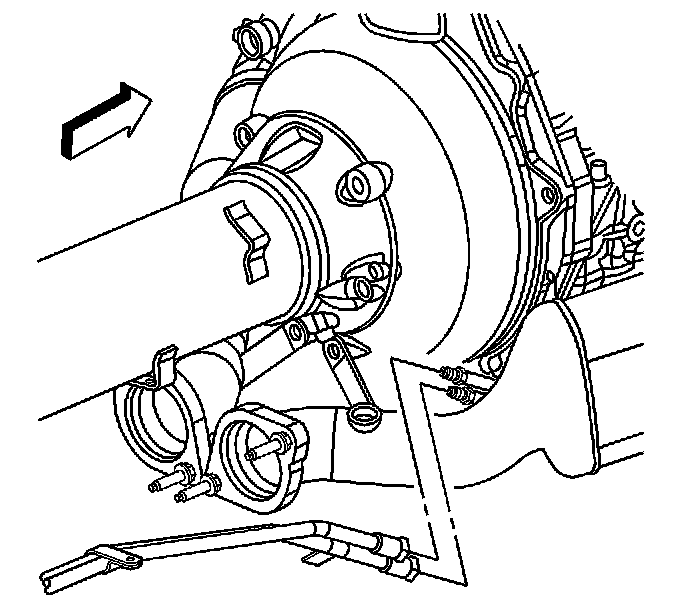
34. Disconnect the front TOC lines from the rear TOC line set.
35. Disconnect the oil level sensor electrical connector.
Important: Note the position of the TOC lines to ensure proper installation.
36. Remove the TOC lines.
Installation Procedure
1. Install the TOC lines.
2. Connect the oil level sensor electrical connector.
3. Connect the front TOC lines to the rear TOC line set.
4. Connect the upper and lower TOC retainer clip.
5. Install the TOC line to oil pan retaining clips.
Notice: Refer to Fastener Notice.
6. Install the TOC line to oil pan retaining nuts.
Tighten the nuts to 12 N.m (9 lb ft).
7. Lower the vehicle.
Important: When installing the engine mount, be sure to have the locating dowel in the correct position.
8. Install the RH engine mount.
9. Install the RH engine mount heat shield to the engine mount.
10. Install the RH engine mount bracket.
11. Install the RH engine mount bracket bolts.
Tighten the bolts to 58 N.m (43 lb ft).
12. Using the J 28467-B, lower the engine assembly into position.
13. Install the RH engine mount lower nut
Tighten the nut to 58 N.m (43 lb ft).
14. Install the RH engine mount upper nut.
Tighten the nut to 58 N.m (43 lb ft).
15. Install the A/C compressor and power steering pump bracket.
16. Install the A/C compressor and power steering pump bracket bolts.
Tighten the bolts to 50 N.m (37 lb ft).
17. Install the accessory belt tensioner.
18. Install the accessory belt tensioner lower bolt (2).
Tighten the bolt to 25 N.m (18 lb ft).
19. Install the accessory belt tensioner top bolt (1).
Tighten the bolt to 25 N.m (18 lb ft).
20. Install the A/C compressor.
21. Install the lower TOC line to the auxiliary TOC.
22. Connect the lower TOC line to the auxiliary TOC.
23. Install the lower TOC line to the radiator.
24. Connect the lower TOC line to the radiator.
25. Install the right front fascia closeout panel.
26. Lower the vehicle.
27. Evacuate and recharge the A/C system. Refer to Refrigerant Recovery and Recharging.
28. Check the transmission fluid level, add if necessary. Refer to Transmission Fluid Fill Procedure.