Canister Purge Control Valve: Service and Repair
EVAPORATIVE EMISSION (EVAP) CANISTER PURGE VALVE REPLACEMENTREMOVAL PROCEDURE
1. Loosen the fuel filler cap in order to relieve the system pressure.
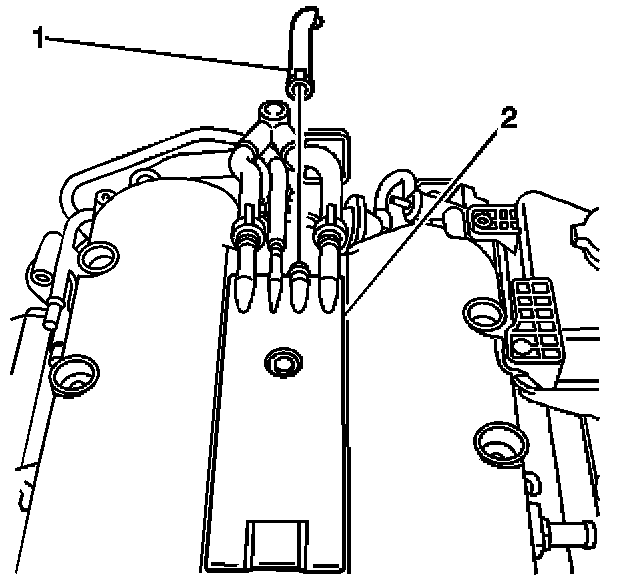
2. Disconnect the evaporative emission (EVAP) canister purge valve vacuum hose (1) from the engine vent adapter (2).
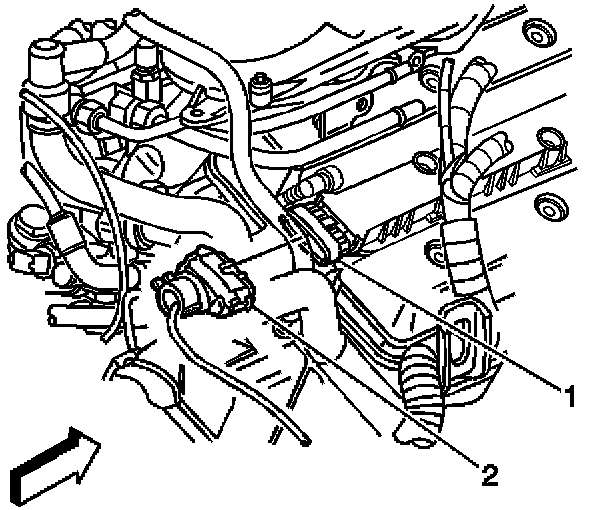
3. Disconnect the electrical connector (2) from the coil pack (1).
4. Disconnect the EVAP quick connect fitting.
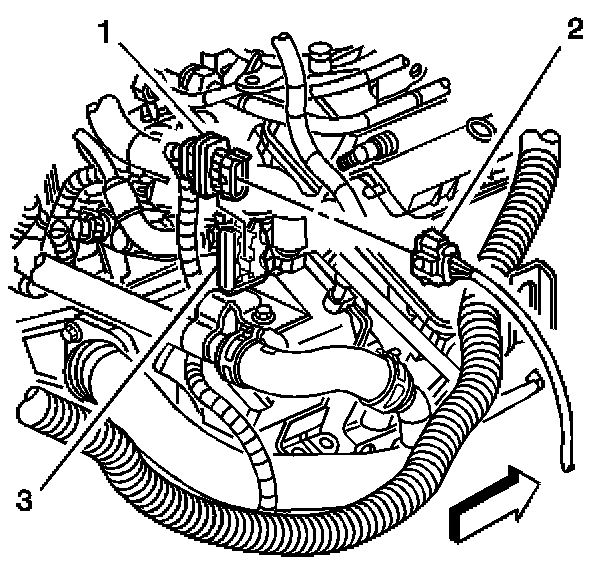
5. Remove the heated oxygen sensor connector (1) from the bracket (3).
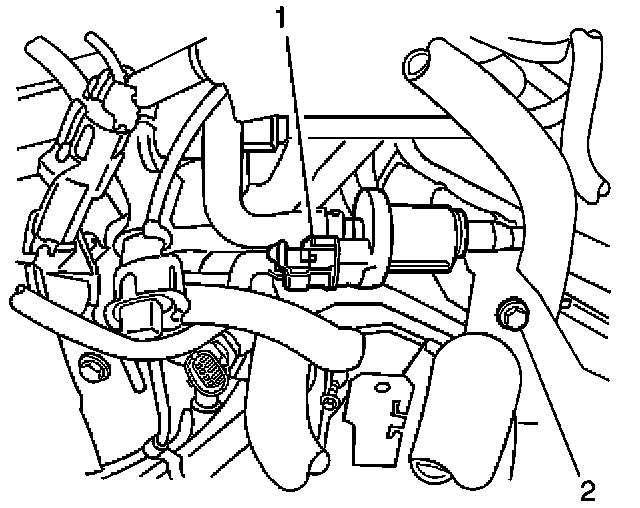
6. Disconnect the electrical connector (1) from the EVAP canister purge valve.
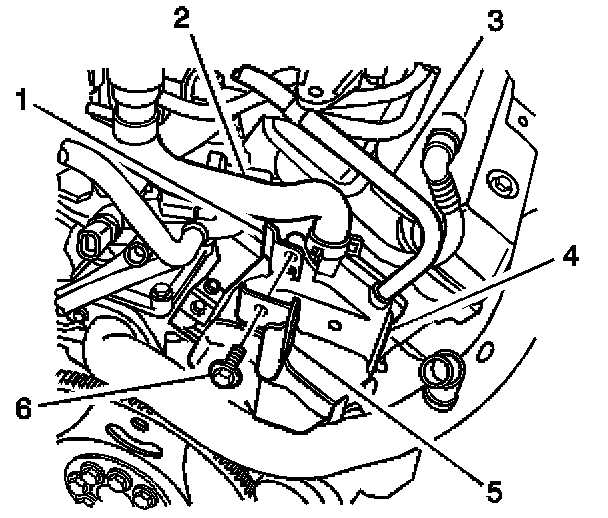
7. Remove the bolt (6) securing the following to the crankcase vent housing (4):
- The heated oxygen sensor connector bracket (5)
- The EVAP canister purge valve bracket (1)
8. Remove the EVAP canister purge valve assembly from the engine.
IMPORTANT: Note the vacuum source hose routing.
INSTALLATION PROCEDURE
1. Position the EVAP canister purge valve assembly behind the intake plenum as previously noted during disassembly.
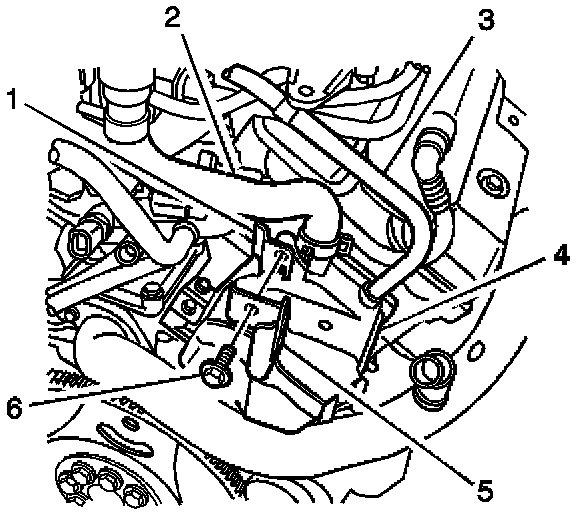
2. Install the bolt (6) securing the following to the crankcase vent housing (4):
- The heated oxygen sensor connector bracket (5)
- The EVAP canister purge valve bracket (1)
NOTE: Refer to Fastener Notice in Service Precautions.
Tighten
Tighten the EVAP canister purge valve bracket bolt to 8 N.m (71 lb in).
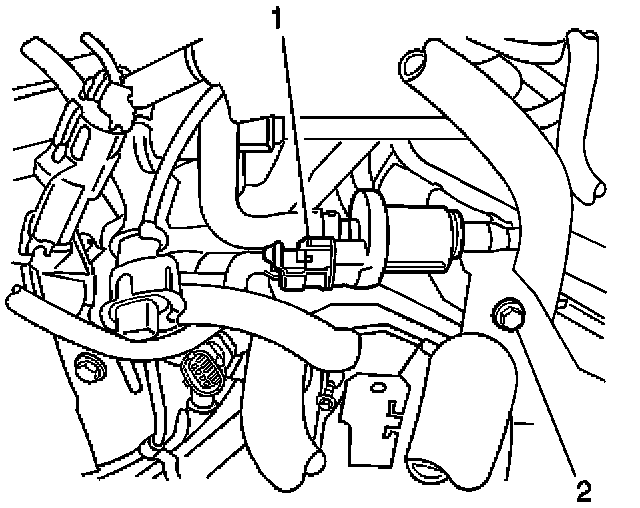
3. Connect the electrical connector (1) to the EVAP canister purge valve.
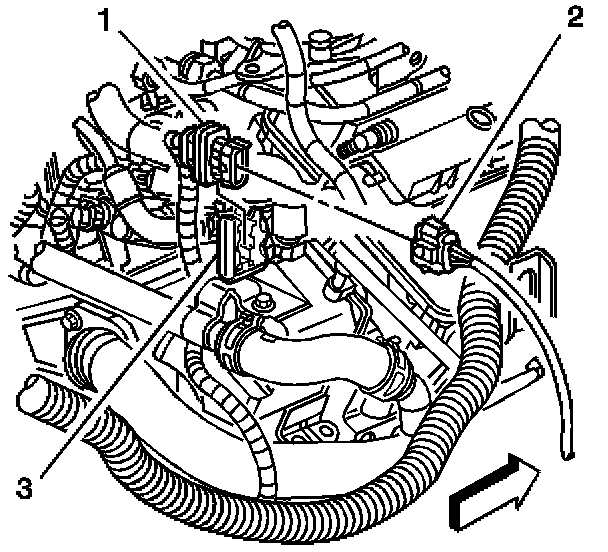
4. Install the heated oxygen sensor connector (1) to the bracket (3).
5. Connect the EVAP quick connect fitting.
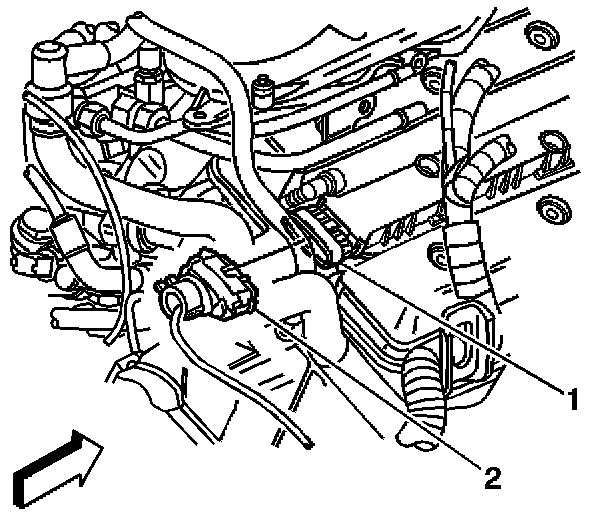
6. Connect the electrical connector (2) to the coil pack (1).
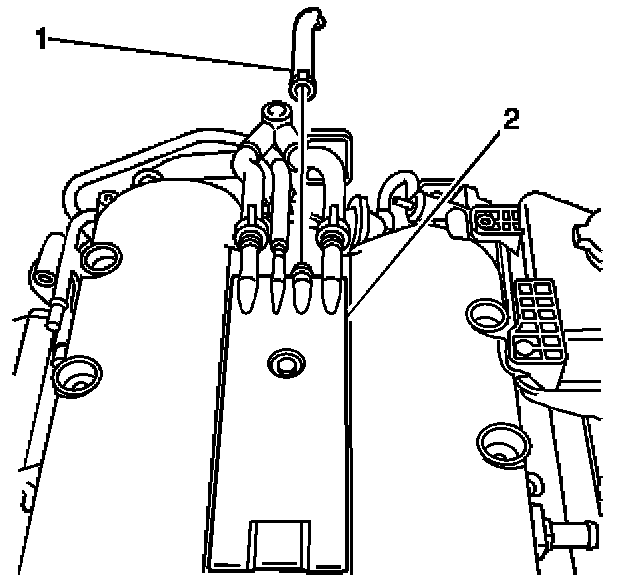
7. Connect the EVAP canister purge valve vacuum hose (1) to the engine vent adapter (2).
8. Tighten the fuel filler cap.