Evaporator Core: Service and Repair
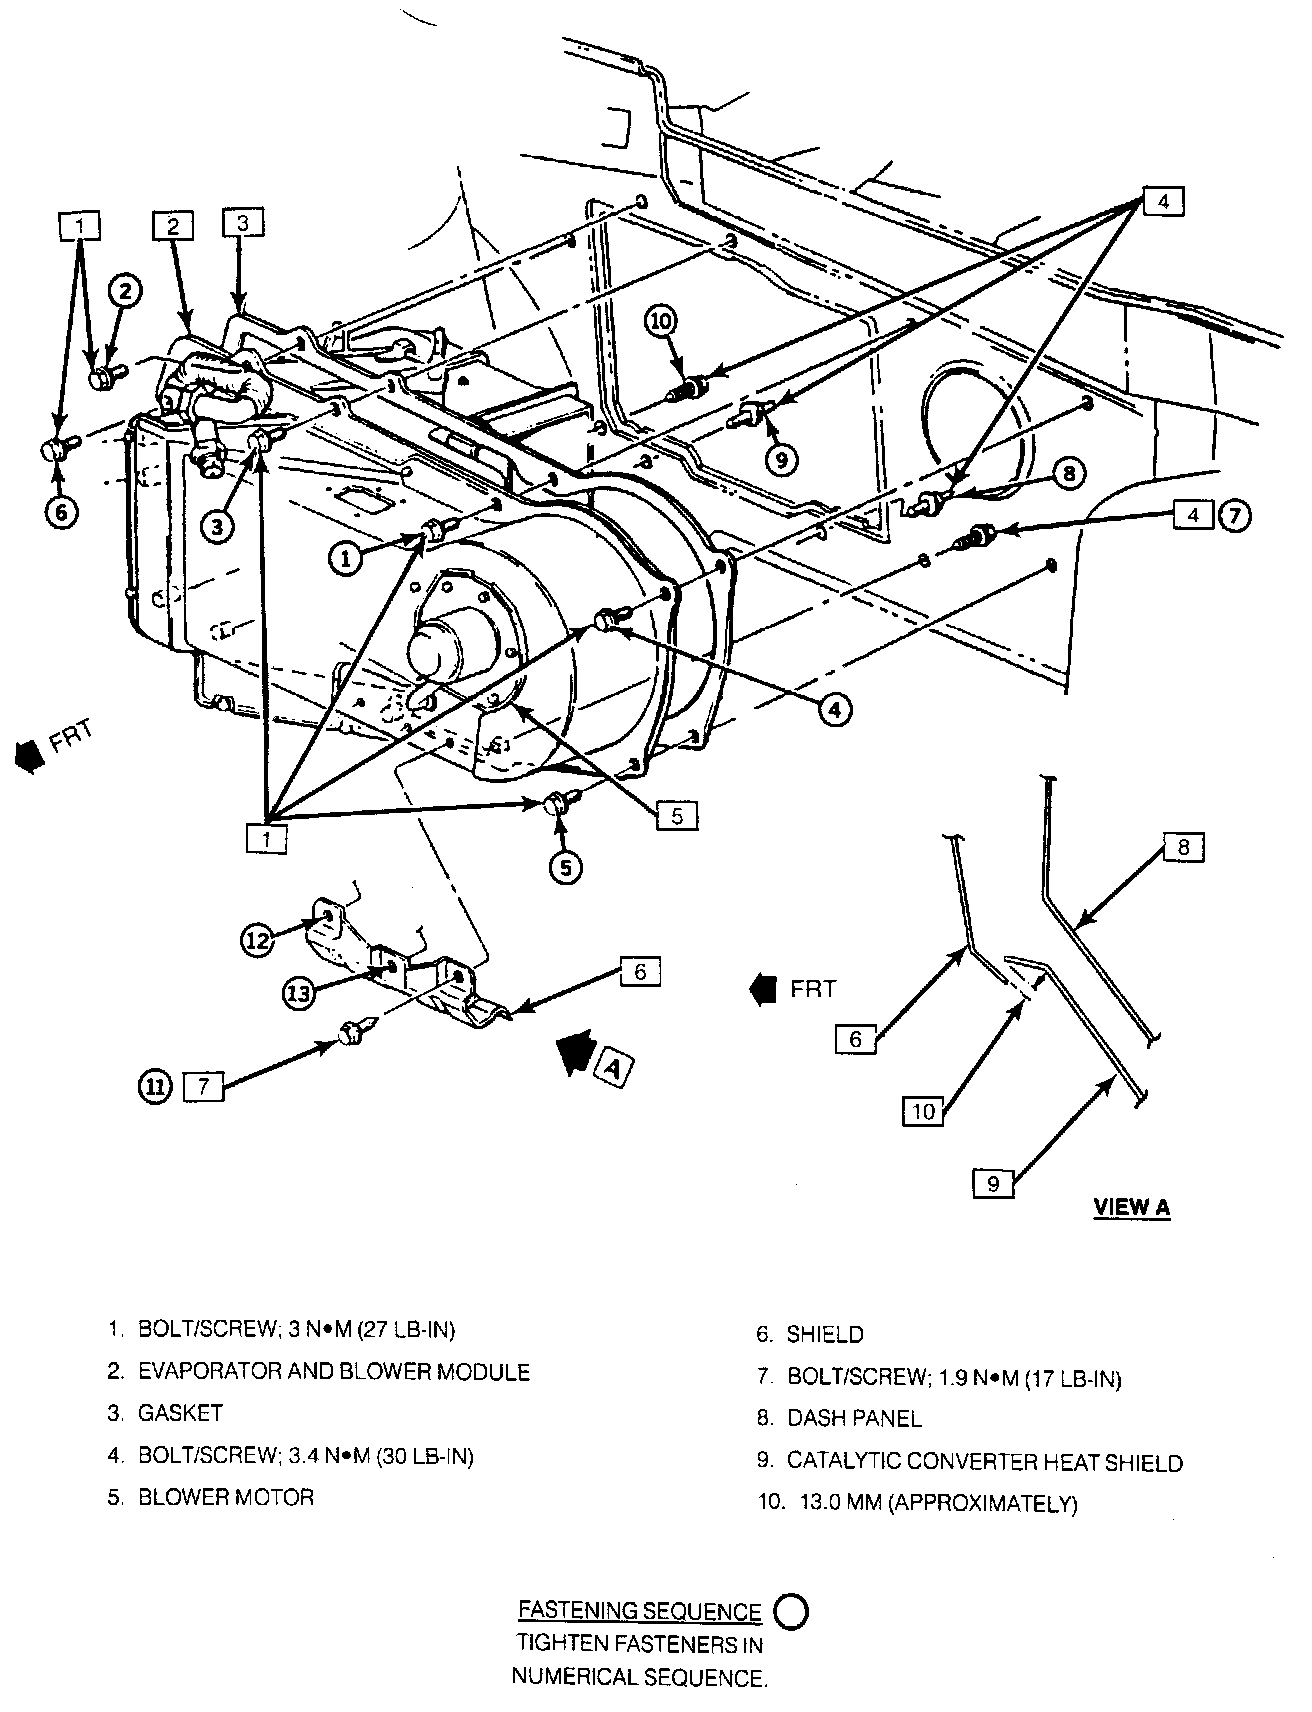
Remove or Disconnect
1. Negative battery cable.
2. Recover refrigerant from A/C system.
3. Rear engine sight shield. Refer to Engine Cover Replacement Service and Repair.
4. Vacuum tank.
5. Relay bracket and position aside.
6. Accumulator to evaporator line.
7. Electrical connections from A/C low side temp sensor, blower motor and power module.
8. A/C low side temp sensor.
9. Evaporator to condenser line from evaporator.
10. Evaporator inlet/outlet lines bracket.
11. Four bolts from top evaporator module.
12. Raise vehicle.
13. Heat shield.
14. Three bolts from bottom evaporator module.
15. Power module.
16. Blower motor.
17. Cut barrier insulator on marked line and remove.
18. Lower vehicle.
19. Four screws from evaporator shield and shield.
20. Evaporator core.
Install or Connect
Reverse procedures to install. Evacuate, charge, and leak test A/C system.
Tighten
^ All A/C lines to 24 N.m (18 lb. if.).
^ A/C low side temp sensor to 24 N.m (18 lb. ft.).
^ Evaporator and blower module bolts to 3 N.m (27 lb. in.).
^ Power module screws to 1.4 N.m (12 lb. in).