Control Valve Body Replacement
REMOVAL PROCEDURE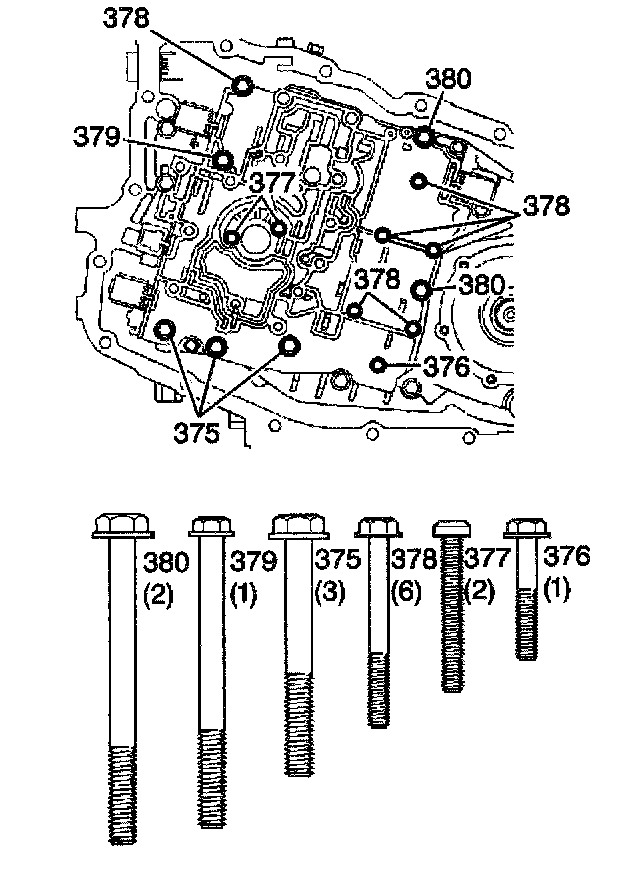
1. Remove the case side cover. Refer to Case Side Cover Replacement.
2. Remove the oil pump. Refer to Oil Pump Replacement.
3. Remove the valve body bolts (375-380).
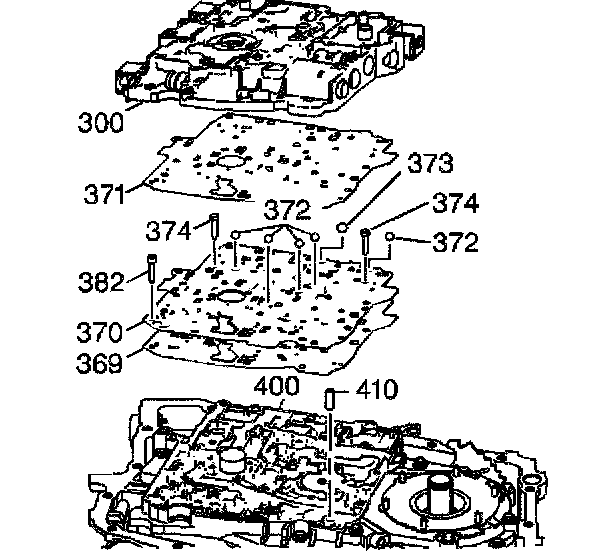
4. Remove the valve body (300) and gasket (371) while keeping the spacer plate (370) with the transaxle.
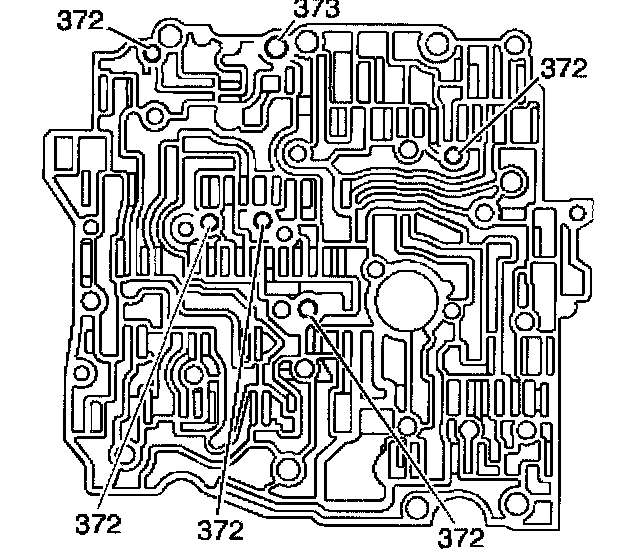
5. Remove the ball check valves (372 and 373) from the valve body.
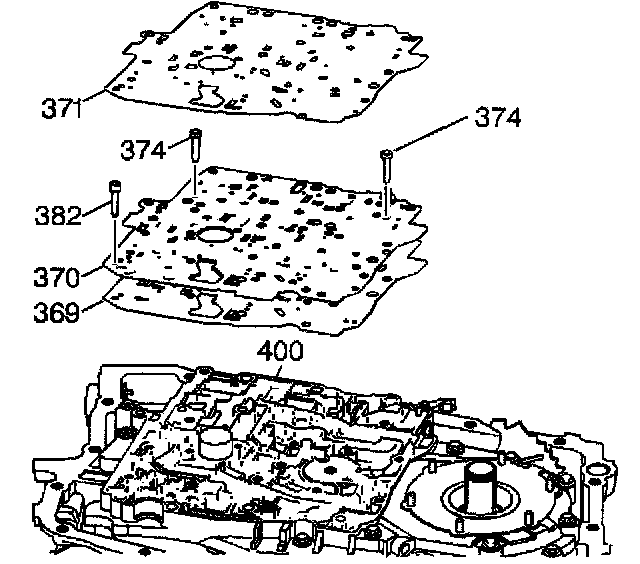
6. Remove the spacer plate (370) and gasket (369).
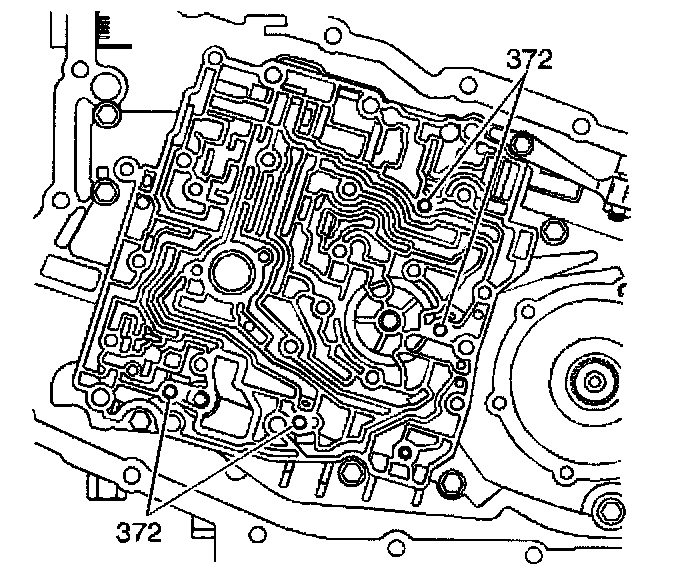
7. Remove the ball check valves (372) from the case cover.
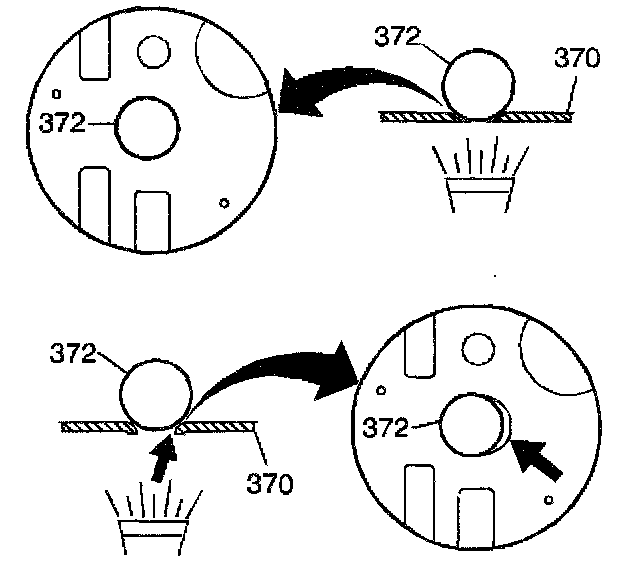
8. Inspect each check valve seat on the spacer plate (370) for excessive peening. Place a ball check valve (372) on each seat and use a flashlight in order to look for visible light between the valve and the seat.
9. Inspect all components removed from the transaxle. Refer to Transaxle Unit Repair.
INSTALLATION PROCEDURE
^ Tool Required
- J 36850 Transmission Assembly Lubricant.
NOTICE: Do NOT use any type of grease to retain parts during the assembly of this unit. Using greases other than the recommended assembly lube changes the transaxle fluid characteristics. Using greases other than the recommended assembly lube causes undesirable shift conditions and/or filter clogging. Use Transjel(R) J 36850 or equivalent during the assembly of this unit.
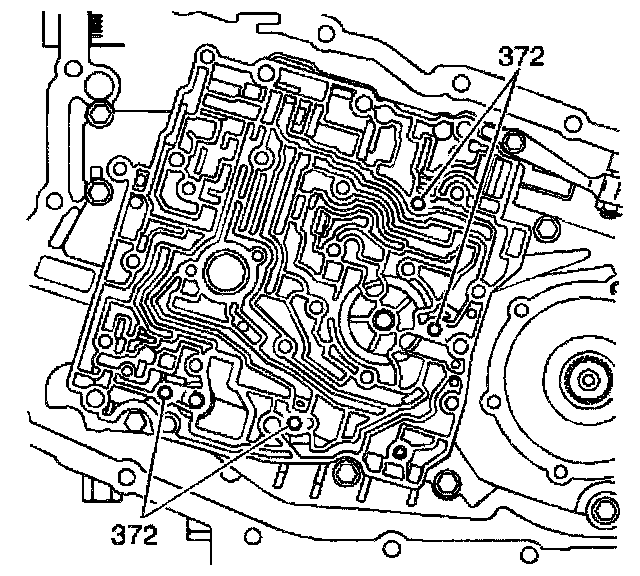
1. Install the ball check valves (372) into the case cover. Use the J 36850.
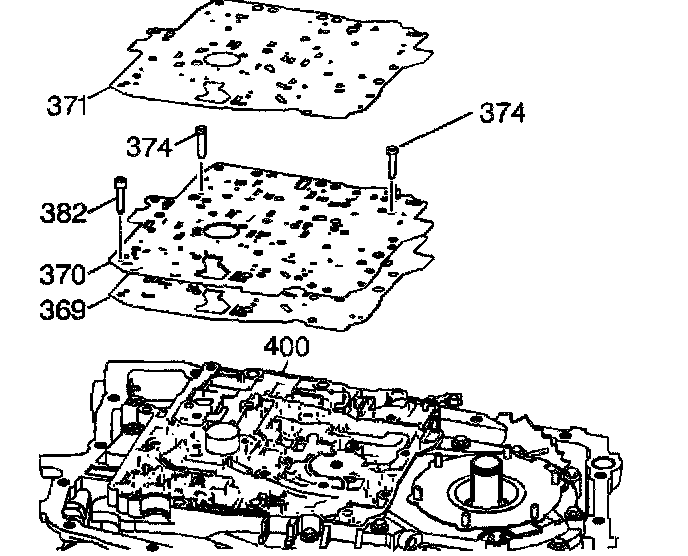
2. Install the gasket (369) and the spacer plate (370).
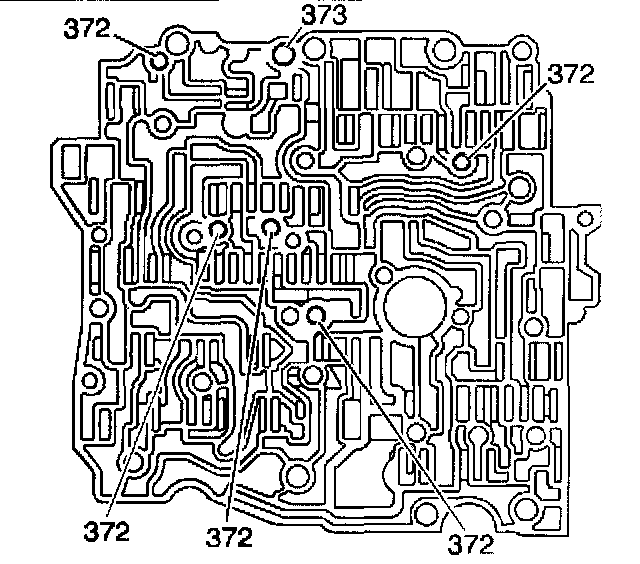
3. Install the ball check valves (372 and 373) into the valve body. Use the J 36850.
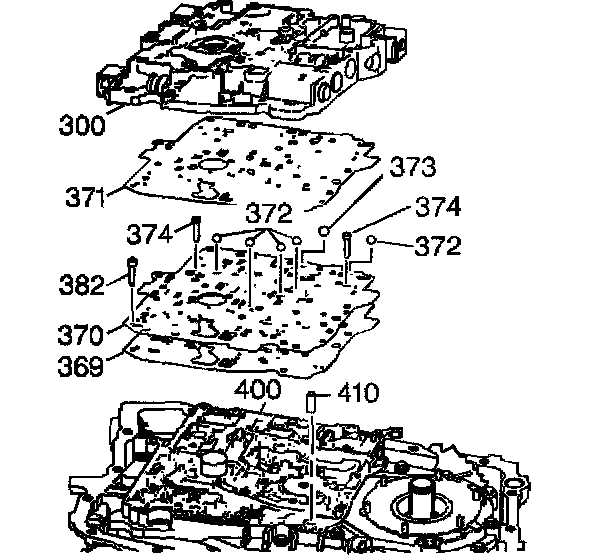
4. Install the gasket (371) and the valve body (300).
IMPORTANT: Do NOT use impact type tools on the valve body or on the oil pump.
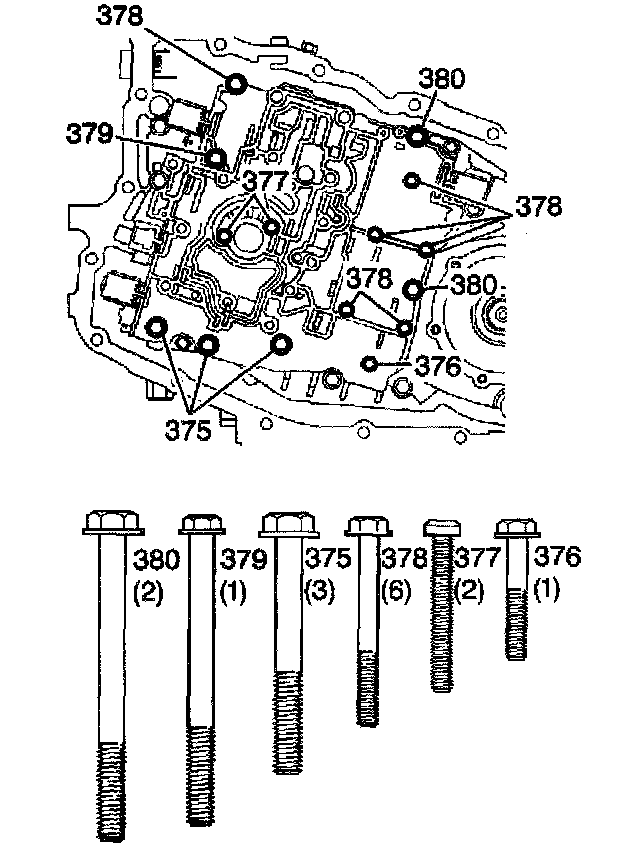
5. Install the body bolts (375-380).
^ Tighten the M6 bolt to 11 Nm (97 inch lbs.).
^ Tighten the M8 bolt to 24 Nm (18 ft. lbs.).
NOTICE: Refer to Fastener Notice in Service Precautions.
IMPORTANT: Do NOT use impact type tools on the valve body or on the oil pump.
6. Install the oil pump. Refer to Oil Pump Replacement.
7. Install the case side cover. Refer to Case Side Cover Replacement.