Side Window
Side Window
Removing
When removing a window, always wear protective eyewear and leather gloves.
• Before removing side windows, disconnect all electrical wiring to connectors if necessary and secure them to center of window with adhesive tape.
Remove the following trim pieces:
- Side luggage compartment trim panel.
- D-pillar trim.
- Trim above the rear side window.
- C-pillar trim.
- From the (VAS 6452/1) , pull out approximately 13 feet (4 meter) of cutting wire (about 4 turns) and cut it.
- Protect the body flange - 2 - with tape on the around the awl - 1 -.
- Poke the awl through the bead of adhesive from the inside to the outside as illustrated and pull the cutting wire. - 3 - toward the inside.
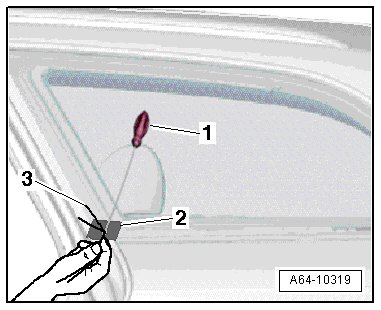
- Install the cutting wire under the side window molding all the way around as illustrated.
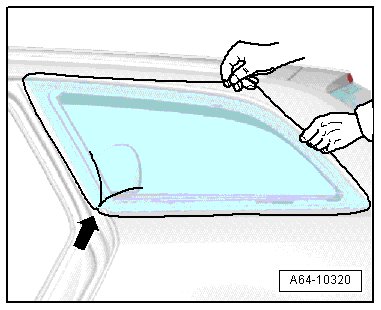
The ends of the wire must not be twisted when cutting through the adhesive - arrow -.
- Attach the spool with the 2 retraction spools near the D-pillar.
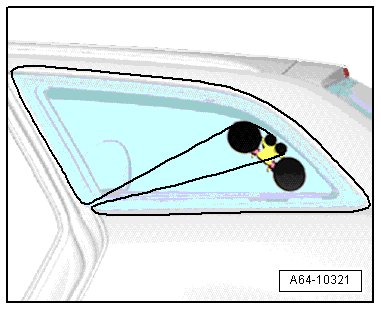
- The ends of the cutting wire are secured in both retraction spools.
- Cut free the window at the bottom further up to about the center.
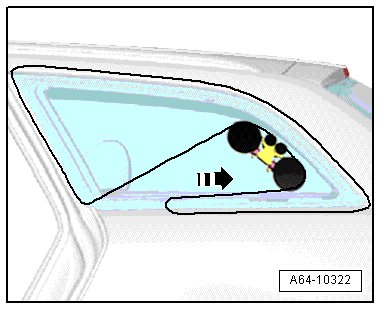
- Insert the cutting wire into the lower guide on the spool and cut free the window in direction of arrow.
- Tension the cutting wire with the spool on the C-pillar and, wearing a leather glove, push it through the adhesive in direction of arrow.
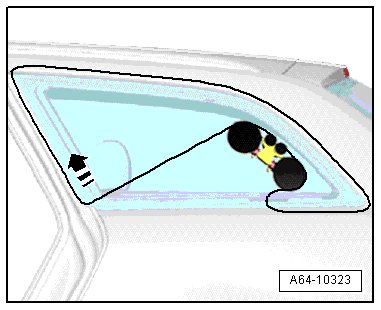
- Pull the cutting wire in direction of arrow through the adhesive with the spool on the upper edge of the window.
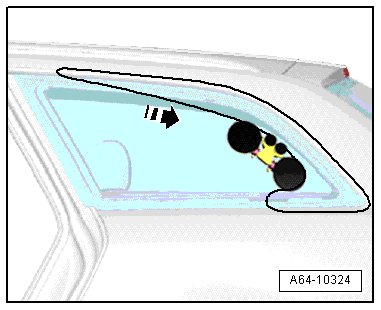
- Cut free the window as far as the D-pillar.
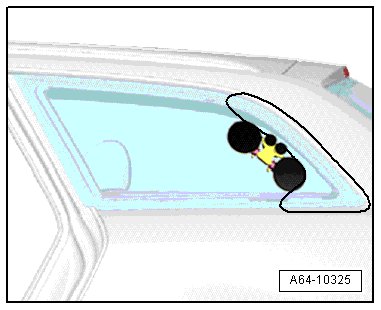
- Move the spool and cut free further on the D-pillar downward in direction of the arrow.
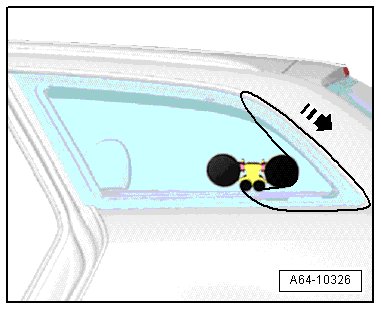
- Move the spool to the center of the window and, wearing a leather glove, push the cutting wire downward in direction of the arrow.
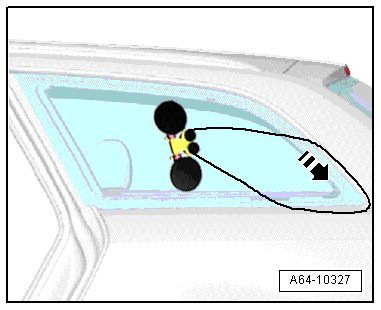
- Cut free the entire window and remove it.
Installing
Preparations For Installing Side Window
- When reusing the undamaged window, cut rest of adhesive material on window and body flange with (V.A.G 1561 A) and (V.A.G 1561/8) so it is even, but do not remove completely.
• Residual material acts as a base for the new adhesive sealing material.
• Keep adhesive surface free of dirt and grease.
• Only cut back adhesive surface shortly before installation.
• Do not prime or use a cleaning solution on the adhesive surface.
With New Window
- Clean window all around in adhesive area using Cleaning Solution (D 009 401 04).
- Apply Glass/paint primer (D 009 200 02).
Ceramic application on window is not primer! It must be primed before the application of adhesive sealing material!
- The windshield or rear window must be primed and the adhesive must be applied when being installed.
- Pay close attention to the distance between the bead of adhesive and the edge of the window, refer to => [ (Item 3) Adhesive Sealing Material ] Flush-Bonded Side Window Overview.
- Observe the minimum curing time. Refer to => [ Minimum Curing Times ] Minimum Curing Times.