Shift Mechanism Function Unit
Shift Mechanism Function Unit
Special tools, testers and auxiliary items required
• Pry Lever - Rmv Outside Mirror (80 - 200)
Removing
The decoupling elements in the front exhaust pipe could get damaged.
• Do not bend decoupling elements in front exhaust pipe more than 10°.
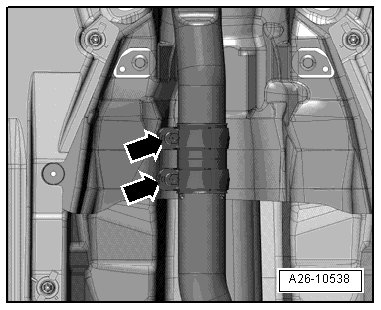
- Loosen the clamping sleeve - arrows -, slide it to the rear, lower the front exhaust pipe slightly and tie it to the underbody.
- Remove the ball socket - 1 - on the selector lever cable from the selector shaft lever using the (80 - 200).
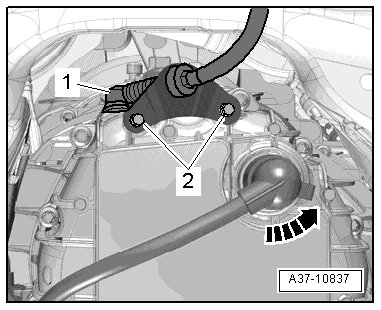
- Remove the bolts - 2 - from the cable mounting bracket.
• Do not bend or kink the selector lever cable.
• Ignore - arrow -.
- Remove the selector lever handle. Refer to => [ Selector Lever Handle ] 0AW Continuously Variable Transmission.
- Remove the front ashtray or storage compartment.
- Disconnect the connectors - 2 and 4 -.
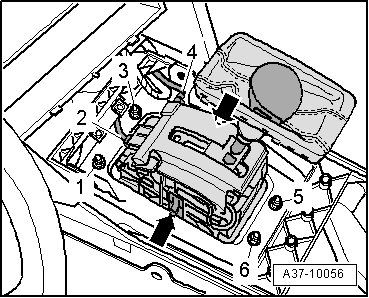
• The illustration does not show the insulation mat.
• A second technician is required when detaching shift mechanism below vehicle.
• Ignore - arrows -.
- Remove the insulation mat over the shift mechanism.
- Remove the bolts - 1, 3, 5 and 6 -.
- Remove the selector mechanism.
Installing
Install in reverse order, paying attention to the following:
• For the correct tightening specifications, refer to => [ Selector Mechanism Overview ] Selector Mechanism Overview.
• Lubricate the ball socket on the selector lever cable with polycarbamide grease (G 052 142 A2) before installing.
• Do not bend or kink the selector lever cable.
- Adjust the selector lever cable. Refer to => [ Selector Lever Cable, Adjusting ] Adjustments.
- Selector mechanism, checking. Refer to => [ Selector Mechanism, Checking ] Selector Mechanism, Checking.
- Install the front ashtray or storage compartment.
- Install the selector lever handle. Refer to => [ Selector Lever Handle ] 0AW Continuously Variable Transmission.
- Install the exhaust system.