Heater Core on Driver-Side
Heater core, removing and installing
NOTE:
- From November 2000, a running change in production led to a modified A/C housing. Revised heater cores (version "2") and changed coolant lines to heater cores are installed on this A/C housing. Changed heater cores have different dimensions, so that the fitting in the A/C housing also had to be changed.
- The A/C housing with version "2" heater cores can be identified from the outside via the coolant lines to the heater core:
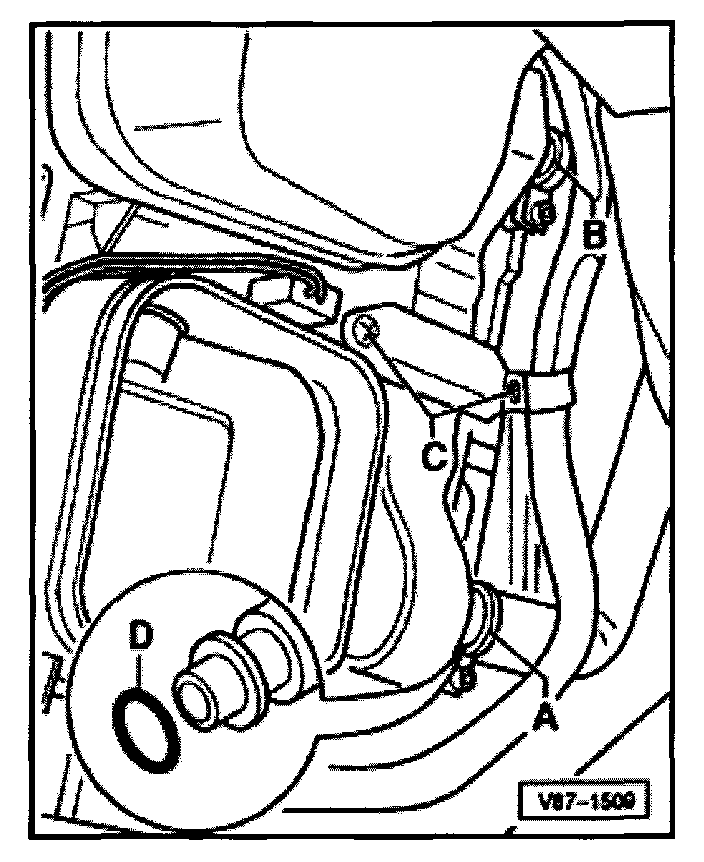
- The coolant lines for version "1" are inserted into the heater core from the front.
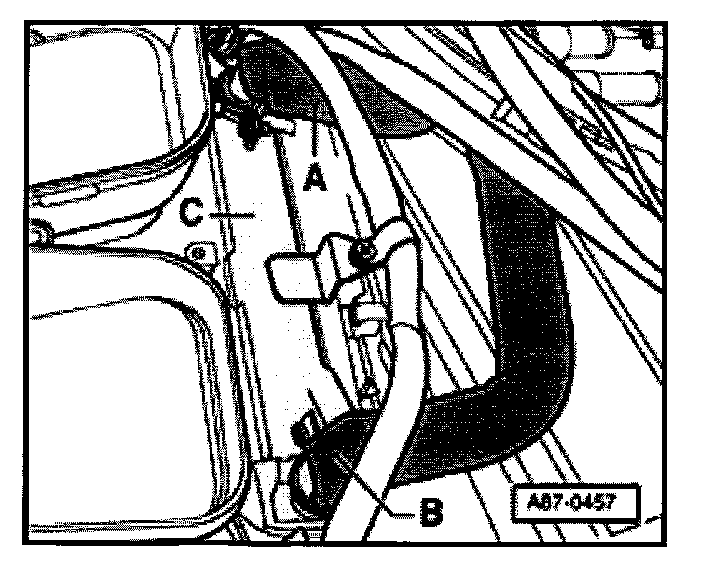
- Coolant lines -A- and -B- for version "2" are inserted into the heater core -C- from the side.
Special tools and equipment
- Hose clamps 3093 or 3094
- VAG1306 drip tray
- Compressed air gun, standard
Heater core of driver-side heating system, removing and installing
- Remove windshield wipers complete
- Remove passenger-side heater core.
WARNING!
The cooling system is pressurized when the engine is warm Wear gloves and other appropriate protection, and slowly and carefully release system pressure, if necessary, be fore performing repairs.
- Remove driver-side shelf and side trim of center console.
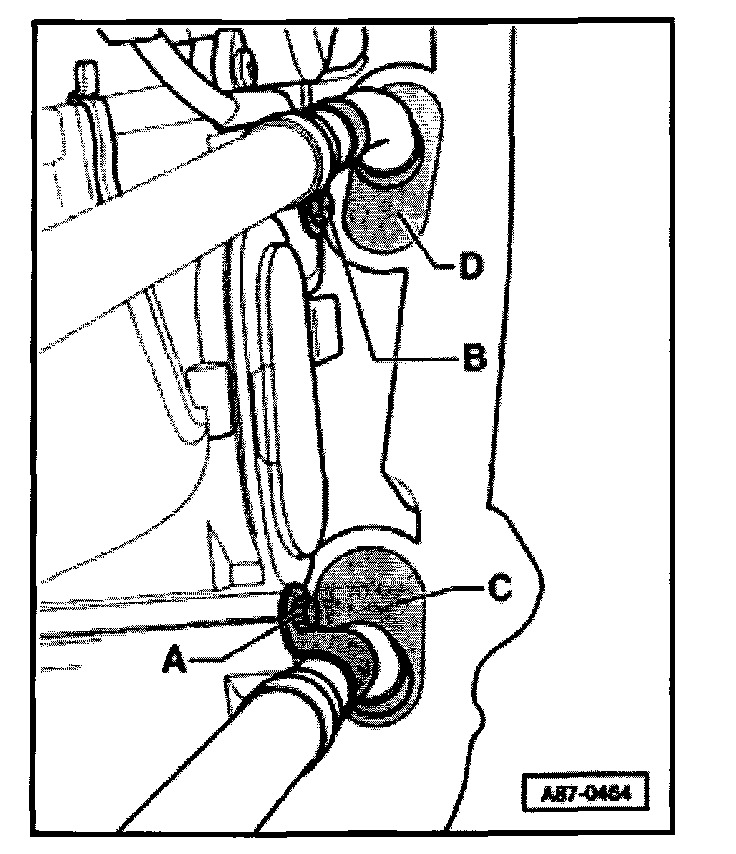
- Loosen screws at clips -A- and -B- for coolant hoses each about 2 turns.
- Lightly cover contact surface of both coolant lines at both grommets -C- and -D- with silicone lubricant (so that the lines can be moved without changing the position of the grommet).
- Remove footwell air outlet.
- Cover floor carpet in area below heater core with leak-proof foil and absorbent paper.
Version "1 " heater core, removing
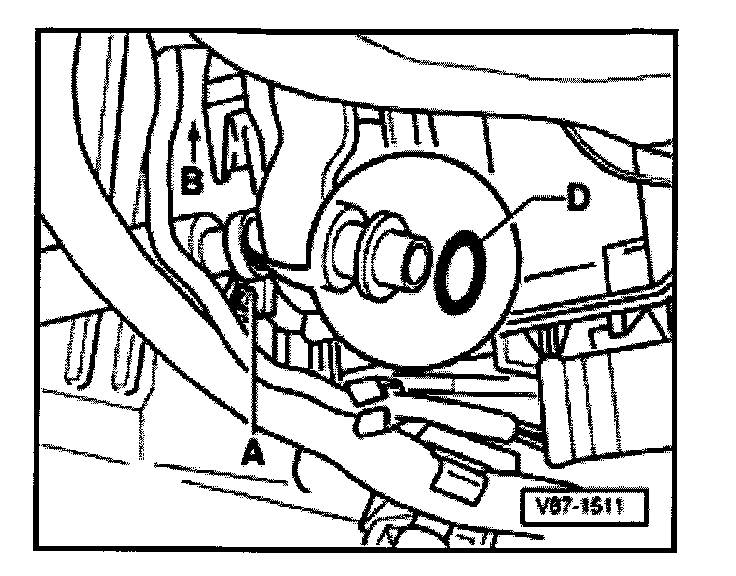
- Remove clamp -A- and -B-.
- Push both coolant lines in direction of "plenum chamber".
NOTE: Since the grommet in the area of passage of the coolant lines is slightly covered with silicone lubricant, the lines can be moved without moving the grommet from the A/C housing.
- Slide out heater core in direction of passenger side (perpendicular throuth A/C housing).
Version "2" heater core, removing
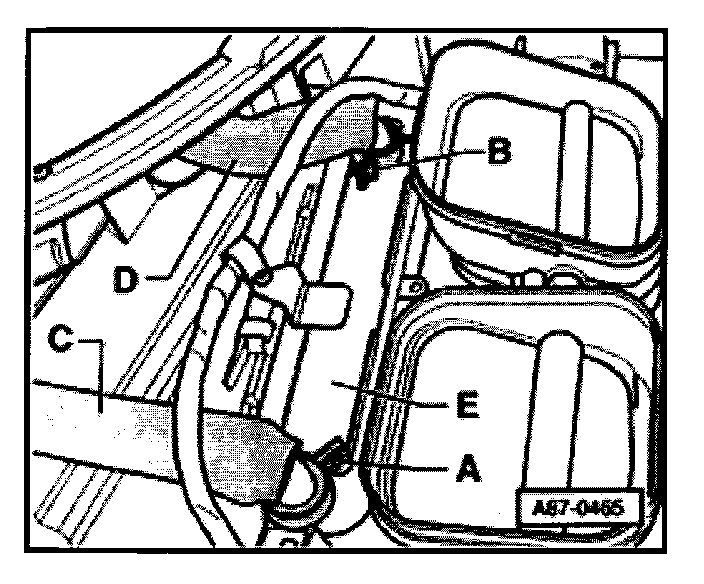
- Remove clamp -A- and -B-.
- Disconnect coolant lines -C- and -D- from heater core -E-.
- Slide out heater core in direction of passenger- side (perpendicular throuth A/C housing).
Version "1 " heater core, installing
Installation is reverse of removal, noting the following:
- Always replace gaskets and sealing rings -D-.
- Slide heater core perpendicularly through the A/C housing from the passenger-side.
- Further work steps for installation.
Version "2" heater core, installing
Installation is reverse of removal, noting the following:
- Slide heater core perpendicularly through the A/C housing from the passenger-side.
NOTE:
- Sealing rings must always be replaced.
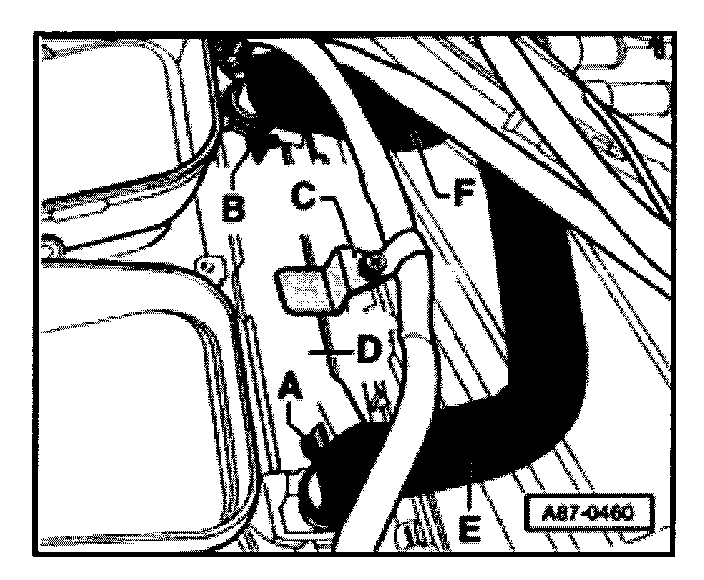
- It makes sense to insert the heater core for passenger-side into A/C housing and to secure the bracket with bolt -C-, so that the heater core does not slide back into the A/C housing.
- Check position of the grommets -C- and -D- in the opening of the coolant lines to plenum chamber before installing the glove compartment and the plenum chamber cover.
- Further work steps for installation.