Left Instrument Panel Relay Carrier
Left Instrument Panel Relay Carrier
The relay carrier on the left side of the instrument panel is clipped into a bracket in the driver footwell.
Removal
- Switch off the ignition and all electrical consumers and remove the ignition key.
- Remove the cover in the driver footwell.
- Remove the trim on the driver side.
USA and Canada
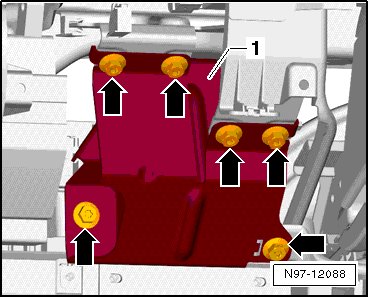
- Unscrew the six mounting bolts - arrows - and remove the deformation element - 1 -.
Continuation for all vehicles
- Press the locking button - arrow - and tilt the relay carrier starting on the right side out of the bracket.
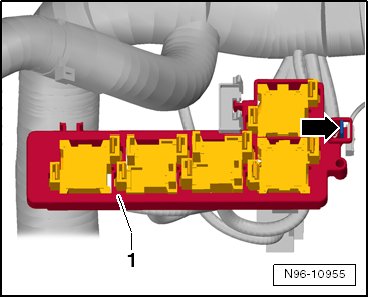
- Turn the relay carrier while paying attention to the connected wires.
- Press the 2 release buttons on the back of the relay connector - arrows - inward and remove the relay connector - 1 - together with the relay from the relay carrier - 2 -.
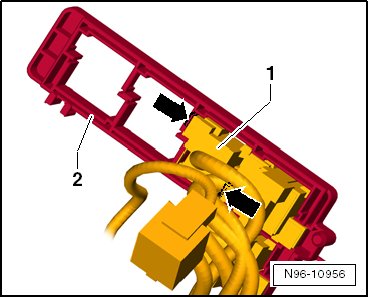
- Perform this procedure consecutively at all available relays and then remove the relay carrier - 2 -.
Installation
Installation is performed in the reverse order of removal. Note the following:
- First latch the relay connectors together with the relay in the relay carrier.
- First insert the relay carrier - 2 - into the guide - 1 - and then tilt it in on the other side and latch it in place.
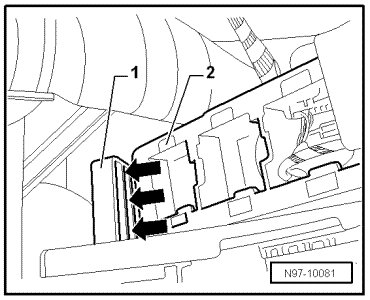
• During installation, ensure secure latching of the relay connectors in the relay carrier and of the relay carrier in its bracket.
USA and Canada
- Tighten the mounting bolts - arrows - of the deformation element - 1 - during installation to 9 Nm.