Upper Timing Chain Cover
Upper Timing Chain Cover
Special tools, testers and auxiliary items required
• Torque Wrench (V.A.G 1783)
• Open End Spanner Insert AF 10 (V.A.G 1783/1)
Removing
- Remove the engine cover. Refer to => [ Engine Cover ] Engine Cover.
- If equipped with a noise generator, open the clip - 1 -, unclip the fuel lines - 2 - and loosen the bolt - 3 - on the Evaporative Emission (EVAP) canister. Move the charge air pipe aside.
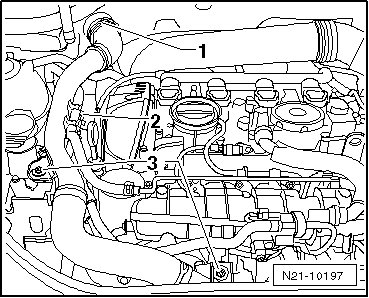
with a EVAP Canister Inside the Engine Compartment
- Disconnect the vent line - 1 -, unlock the EVAP canister - A - and remove it - B -. Move the EVAP canister to the side.
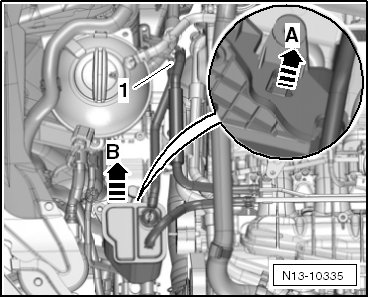
Continuation for All
- Remove the coolant pipe bolts - arrows - from the intake manifold.
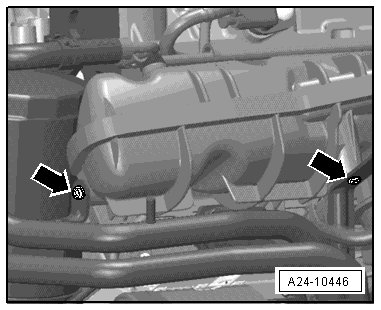
- Press the coolant hoses to the side and secure them with a cable tie.
- Remove the camshaft adjustment valve 1.
- Remove the bolts - 1 through 5 - and remove the upper timing chain cover.
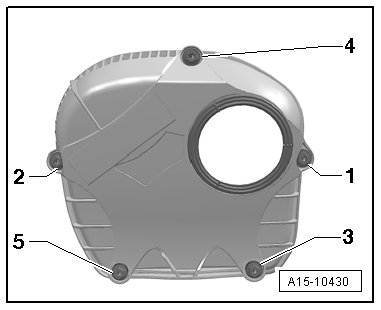
• Remove the lower bolts - 3 and 5 - with an open end wrench.
Installing
- Coat the seal and the O-ring with engine oil.
- Place the cover on the engine making sure the seal fits correctly.
- Tighten the bolts in sequence - 1 through 5 - hand tight.
- Tighten the bolt to 9 Nm using the torque wrench (V.A.G 1783) and the open end spanner insert AF 10 (V.A.G 1783/1) for bolts - 3 and 5 -.
- Install the camshaft adjustment valve 1. Refer to => [ Camshaft Adjustment Valve 1 N205 ] Service and Repair.
- Tighten the bolts - arrows - for the guide tube.
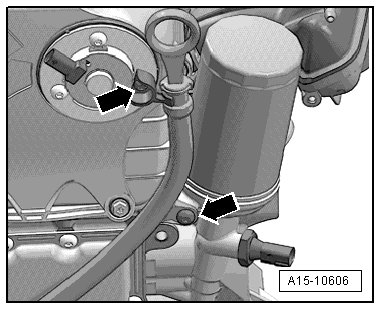
• If the attachment points do not line up, check whether the guide tube is inserted all the way into the lower timing chain cover.
• For the correct tightening specifications, refer to => [ Timing Chain Cover Overview ] Timing Chain Cover Overview.
Further installation is in the reverse order of removal.