Removal and Replacement
Heating and A/C Unit
Special tools, testers and auxiliary items required
• Drip Tray For Shop Crane (VAS 6208)
• Hose Clamps Up To 40 mm Diameter (3093)
• A/C Service Station (ROB 134APF) or newer model
• Torque Wrench (V.A.G 1331)
• Engine Bung Set (VAS 6122)
• Compressed Air Gun, Commercially Available
• Drain the refrigerant in advance with the (ROB 134APF) for vehicles with A/C System (or following models).
• Environmentally hazardous draining of refrigerant is an offense punishable by law.
• See notes, refer to => [ Repairing Vehicles Equipped with A/C and Handling Refrigerants ] Repairing Vehicles Equipped with A/C and Handling Refrigerants.
• Depending on engine and version of vehicle, it may be necessary to loosen or to remove the following components: top engine cover, pressurized air pipe to throttle valve part and depending on engine the intake manifold, etc.
Removing
- Switch off the ignition.
- Disconnect the battery.
- Cover the driver seat and front passenger seat with seat covers.
- Cover the carpet in the front right and left footwell with a fluid resistant foil and absorbent paper.
• Bleed the coolant circuit after it has been opened.
• The coolant system is under pressure when the engine is warm. Reduce the pressure before repairing, if necessary (i.e. carefully open the reservoir).
- Place (VAS 6208) under the engine.
- Drain the coolant circuit.
Contact with hot engine coolant can cause severe scalding.
Coolant temperature can be above 100 °C (212° F) with a warm engine. The cooling system is under pressure.
If necessary, reduce pressure and temperature before repairs.
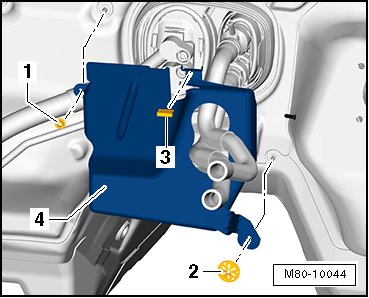
If equipped, remove the heat shield
- Remove nut - 1 - (10 Nm).
- Remove the lock washer - 2 - and the clip - 3 -.
- Remove the heat shield for the expansion valve - 4 - from the bulkhead.
All vehicles
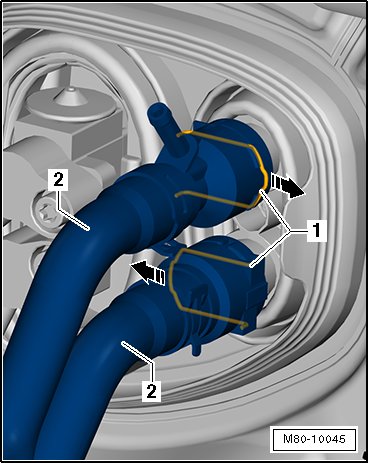
- Label the coolant hoses - 2 - to the heating and A/C unit.
- Remove the coolant hoses for the heater core - 2 - with the (3093).
- Unclip the clip - 1 - and remove the coolant hoses - 2 -.
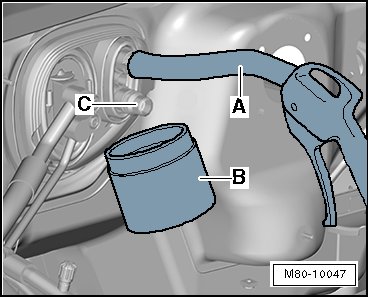
- Connect the hose - A - in the upper connection of the heater core.
- Support the container - B - under the lower connection for the heater core - C -.
- Carefully blow the remaining coolant above the hose- A - out of the heater core and into the container - B - with a compressed-air gun.
Vehicles with A/C
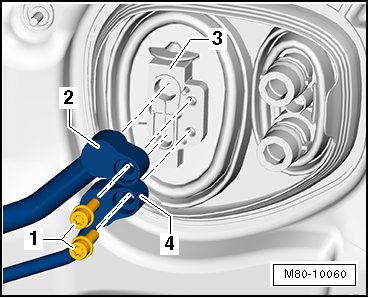
- Discharge the refrigerant circuit with the (ROB 134APF).
- Remove the refrigerant line bolts- 1 - - 2 - and - 4 -; (10 Nm).
- Carefully remove the refrigerant lines - 2 - and - 4 - from the expansion valve - 3 -.
- Connect the refrigerant lines and the expansion valve with suitable sealant i.e. with the (VAS 6122).
- Remove the condensation water hose. Refer to => [ Condensation Water Hose and Vents ] Condensation Water Hose and Vents.
All vehicles
- Remove the driver footwell vent. Refer to => [ Footwell Vent, Driver Side ] Footwell Vent, Driver Side.
- Remove the footwell vent on the front passenger side. Refer to => [ Footwell Vent, Front Passenger Side ] Footwell Vent, Front Passenger Side.
- Remove the rear vent air guide channels. Refer to => [ Front Air Vent Air Guide Channel ] Front Air Vent Air Guide Channel.
- Remove the instrument panel. Refer to Trim Panels and Insulation.
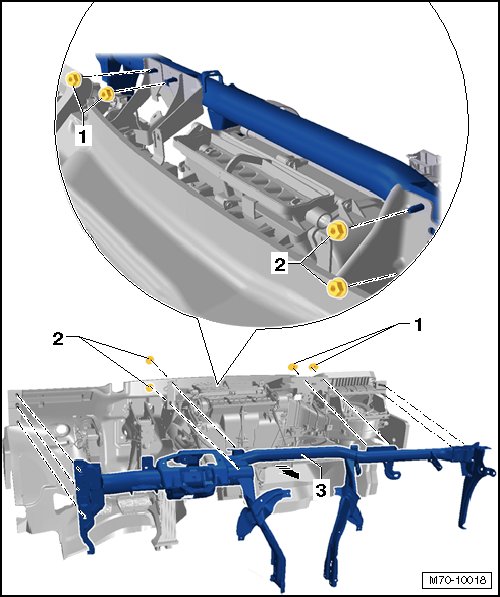
- Remove the nuts - 1 - and - 2 -; 9 Nm.
- Remove the instrument panel crossmember (module carrier) - 3 -. Refer to Trim Panels and Insulation.
- Disconnect all of the connectors for the wiring harness from the heater and A/C unit.
• All cable ties opened or cut during removal must be reinstalled at the same locations during installation.
• It is helpful to make a sketch or take a photo to remember the original installation locations.
• When removing the heater and A/C unit, make sure the two coolant pipes on the heater core do not get caught and bent or damaged on plenum chamber or noise insulation.
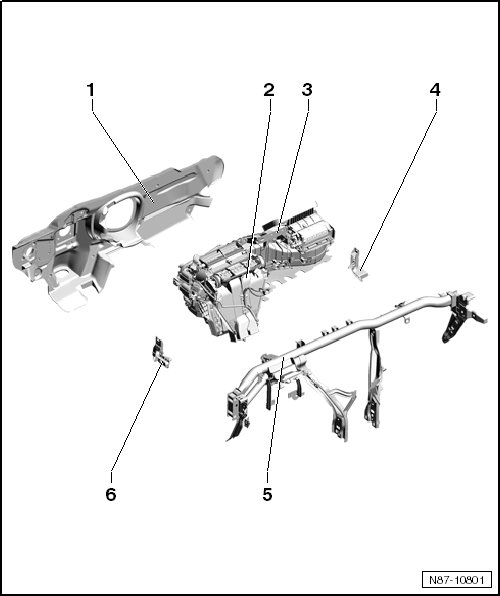
- Remove the heater and A/C unit - 2 - from the bulkhead - 1 - with help from a 2nd technician and remove it from the vehicle.
- Drain the remaining coolant above the (VAS 6208).
Installing
Install in reverse order of removal. When doing this, note the following:
Vehicles without A/C System
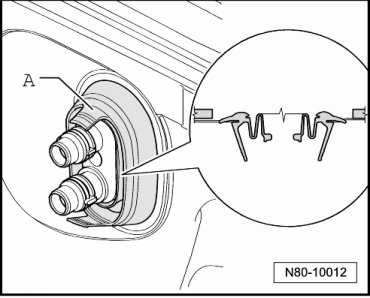
• The installed position of the seal - A - during assembly.
• That all of the wires and cables are correctly routed, not kinked or pinched.
Vehicles with A/C
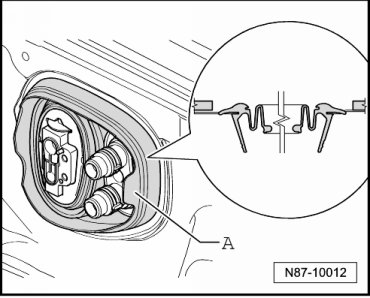
• The installed position of the seal - A - during assembly.
• That all of the wires and cables are correctly routed, not kinked or pinched.