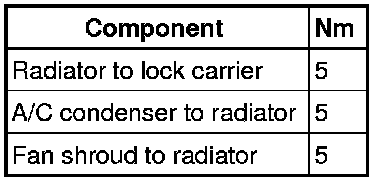
Radiator: Service and Repair
Radiator
Special tools, testers and auxiliary items required
• Refractometer (T10007)
• Drip Tray for VAS 6100 (VAS 6208)
• Hose Clip Pliers (VAS 6362)
• Cooling System Charge Unit (VAS 6096)
• Adapter (V.A.G 1274/8)
Removing
- Remove the front bumper.
- Remove the fan shroud with fans. Refer to => [ Fan Shroud with Fans ] Service and Repair.
- Drain the coolant. Refer to => [ Draining and Filling ] Draining and Filling.
- Disconnect the coolant hoses from the radiator.
• The air guides are not illustrated.
- Remove the radiator bolts - 1 - from the brackets.
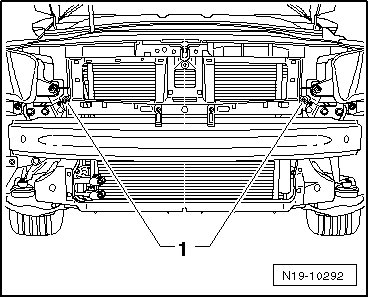
- Move the radiator and Air Conditioning (A/C) condenser toward the rear and out of the lower mounts. While doing this, pull the lock carrier on the left mount - 1 - slightly downward.
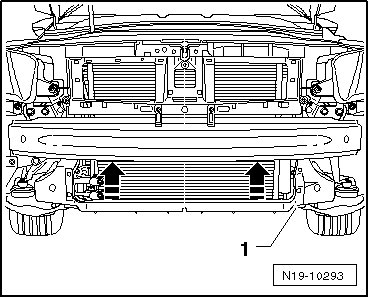
- Push the radiator and A/C condenser to the left so that the right A/C condenser bolts are accessible. Remove the bolts - arrows -.
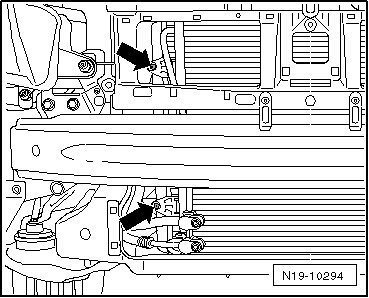
- Push the radiator and A/C condenser to the right so that the left A/C condenser bolts are accessible. Remove the bolts - arrows -.
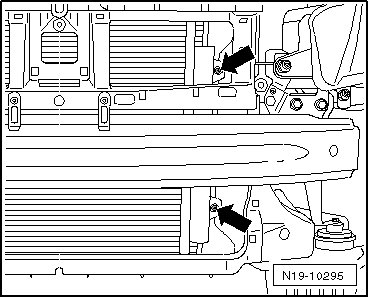
- Remove the radiator downward.
Installing
- Install the radiator and secure the A/C condenser to it.
- Install the radiator and A/C condenser into the lower mounts.
- Move the radiator and A/C condenser forward and install the radiator bolts - 1 -.
Further installation is performed in reverse order.
• When installing a new radiator, the old coolant must not be reused.
- Fill the cooling system. Refer to => [ Draining and Filling ] Draining and Filling.