A/C Clutch
A/C Clutch
Special tools, testers and auxiliary items required
• Pin wench (VAS3212A) (or equivalent)
• Two arm puller
• Three arm puller
• Depth gauge
• Torque wrench (5-50 Nm) or equivalent (VAG 1331 )
• It is not necessary to discharge the refrigerant system to remove and install the A/C Clutch.
• If A/C Clutch is to be removed with compressor installed, first do the following:
• Remove ribbed belt.
• Remove intercooler (engine code ALH only).
• If A/C Clutch is to be removed with compressor removed, first discharge refrigerant system => [ A/C Refrigerant System, Discharging ] A/C Refrigerant System, Discharging.
Removing
Hex Nut
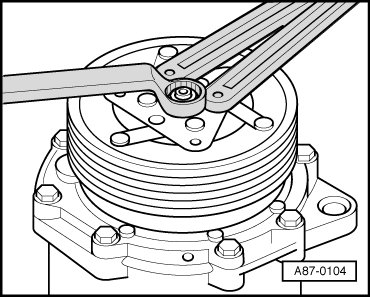
- Remove hex nut while counter-holding with 3213A or equivalent commercially available 2 hole pin wrench (with 4 mm pins).
• Tightening torque: 15 Nm
Clutch Plate
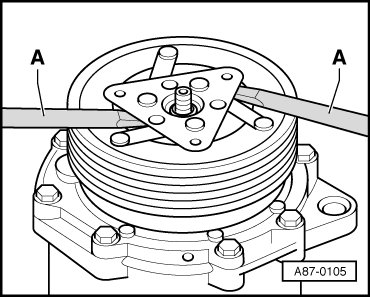
- Carefully pry off clutch plate using two large screwdrivers - A -.
Use locally available 2 or 3 arm puller if plate is securely seated (difficult to remove).
Clutch Pulley
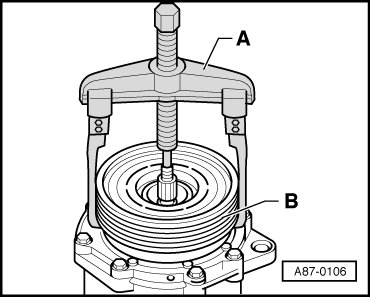
- Remove circlip => [ A/C Clutch, Sanden Assembly Overview ] A/C Clutch, Sanden Assembly Overview, key -=> [ (Item 4) Circlip ] A/C Clutch, Sanden Assembly Overview-.
- Attach commercially available 2 arm puller - A - on shoulder - B - and pull off pulley.
Installing
Clutch Coil
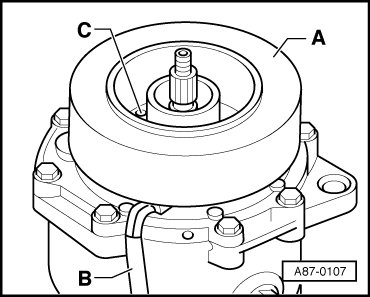
- Install coil on compressor.
- Locate locking pin on coil - A - into recess - C -.
Clutch Plate Gap
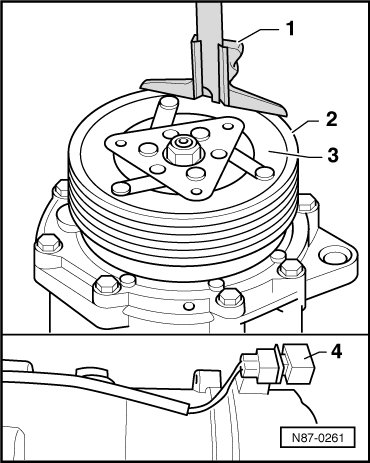
• Gap: 0.4 - 0.8 mm (0.015 - 0.023 in)
Determine "Dimension 1"
- Using depth gauge - 1 -, measure gap between top of clutch plate - 3 - and clutch pulley - 2 - at three equally spaced locations (measurement must not deviate).
Determine "Dimension 2"
- If compressor is installed in vehicle, disconnect compressor electrical connector - 4 - from vehicle wiring harness.
- Using a jumper wire, energize the clutch coil by applying 12V to connector - A - (battery terminal B+). If compressor is removed from vehicle, compressor must be grounded.
- With clutch energized, measure gap between pulley - 2 - and clutch plate - 3 - with depth gauge - 1 -.
The allowable gap (0.4 - 0.8 mm / 0.015 - 0.023 in) is the difference between "Dimension 1" and "Dimension 2".
• Gap must be within tolerance around entire circumference.
• If gap is outside the permitted tolerance range, remove clutch plate and adjust gap by adding or removing shims => [ Shims ] A/C Clutch, Sanden Assembly Overview, key -=> [ (Item 3) ] A/C Clutch, Sanden Assembly Overview-.