Removal And Installation
TRANSAXLE ASSEMBLY
Removal and Installation
WARNING:
Never remove the reservoir tank cap when the engine is hot. Serious burns could occur from high-pressure engine coolant escaping from the reservoir tank.
REMOVAL
1. Remove the engine and transaxle assembly and front suspension member. Refer to Service and Repair.
2. Lift with hoist and separate engine and transaxle assembly from front suspension member. Refer to Service and Repair.
3. Disconnect secondary speed sensor connector. Refer to Exploded View.
4. Disconnect CVT unit connector.
5. Remove CVT fluid charging pipe from transaxle assembly.
6. Disconnect starter harness connectors.
7. Remove starter assembly. Refer to Service and Repair.
8. Remove upper rear CVT gusset bolt.
9. Remove transaxle assembly bolts with power tool.
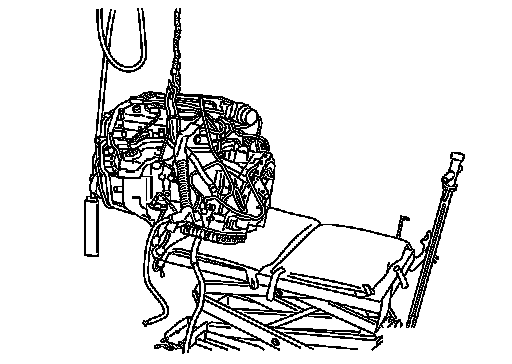
10. Remove transaxle assembly from engine assembly with a hoist.
11. Remove air breather hose. Refer to Exploded View.
12. Remove CVT fluid cooler tube from transaxle assembly.
INSTALLATION
Installation is in the reverse order of removal.
- CAUTION:
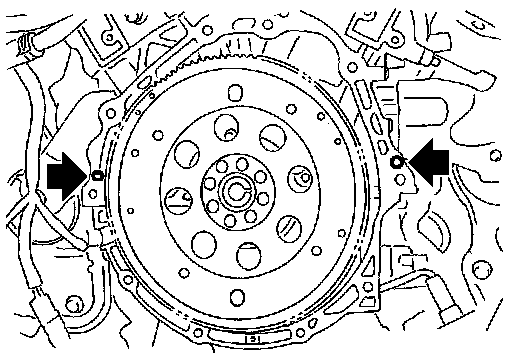
Check alignment of dowel pins when installing transaxle assembly to engine assembly.
- Arrow Indicates Dowel pins.
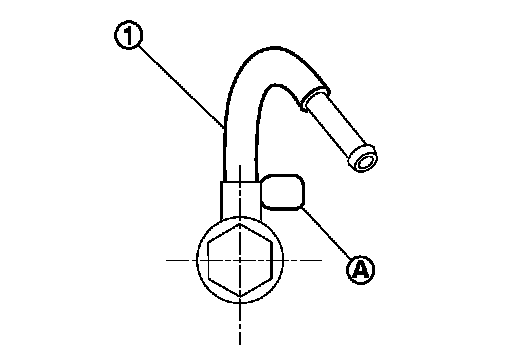
- When installing CVT fluid cooler tube (1) to transaxle assembly:
- Contact CVT fluid cooler tube a boss portion (A) of the transaxle case.
- Tighten the bolt of CVT fluid cooler tube without moving the CVT fluid cooler tube.
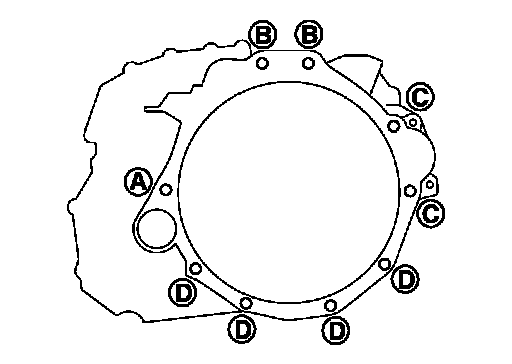
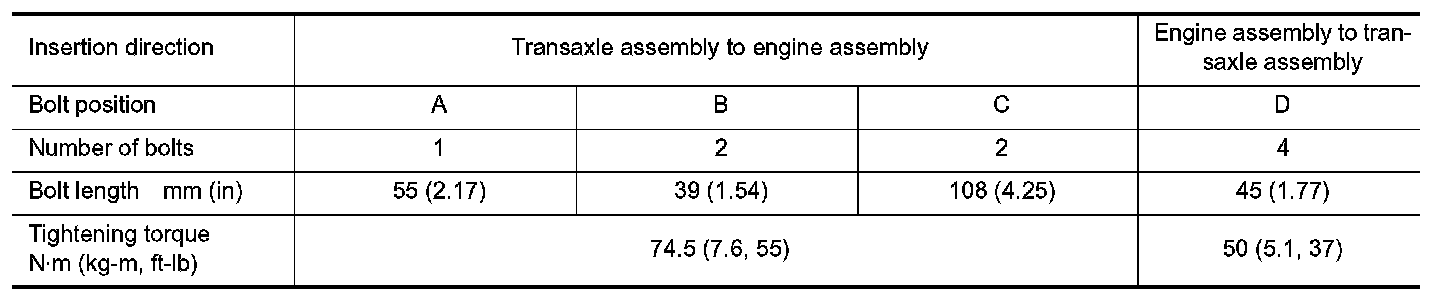
- When installing transaxle assembly to the engine assembly, install the bolts in accordance with the following.
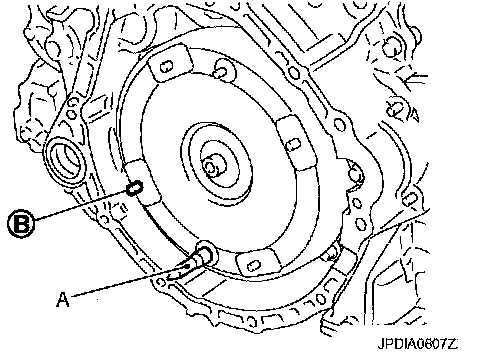
- When using a suitable tool (A), set it to the stud bolts which is used to install it to the torque converter.
- When not using drive plate location guide, rotate torque converter so that the stud bolt (B) for mounting the drive plate location guide of torque converter aligns with the mounting position of service hole.
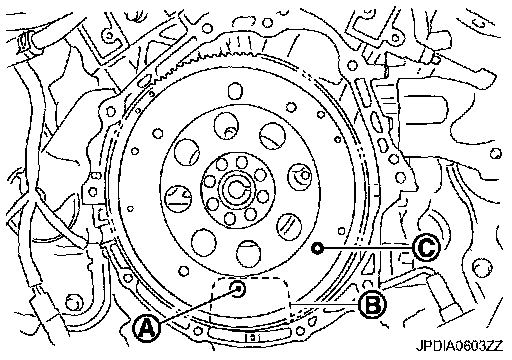
- Rotate crankshaft so that the hole (A) for inserting drive plate location guide of drive plate aligns with the service hole (B).
NOTE:
When not using drive plate location guide, insert stud bolt of torque converter into the hole (C) of drive plate, aligning the drive plate hole position and torque converter.
CAUTION:
Be careful not to strike the drive plate when installing the torque converter stud bolt.
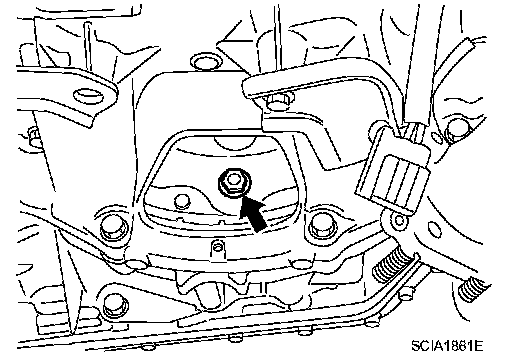
- Align the position of torque converter nuts for drive plate with those of the torque converter, and temporarily tighten the nuts. Then, tighten the nuts to the specified torque.
- Arrow Indicates Torque converter nuts
Tightening Torque : 51 N.m (5.2 kg.m,38 ft.lb)
CAUTION:
- When turning crankshaft, turn it clockwise as viewed from the front of the engine.
- When tightening the nuts for the torque converter after installing the crankshaft pulley bolts, confirm the tightening torque of the crankshaft pulley bolts. Refer to Front Timing Chain Case.
- Rotate crankshaft several turns and check that transaxle rotates freely without binding after converter is installed to drive plate.
- Never reuse O-ring.
- Apply grease to O-ring.