Timing Belt: Service and Repair
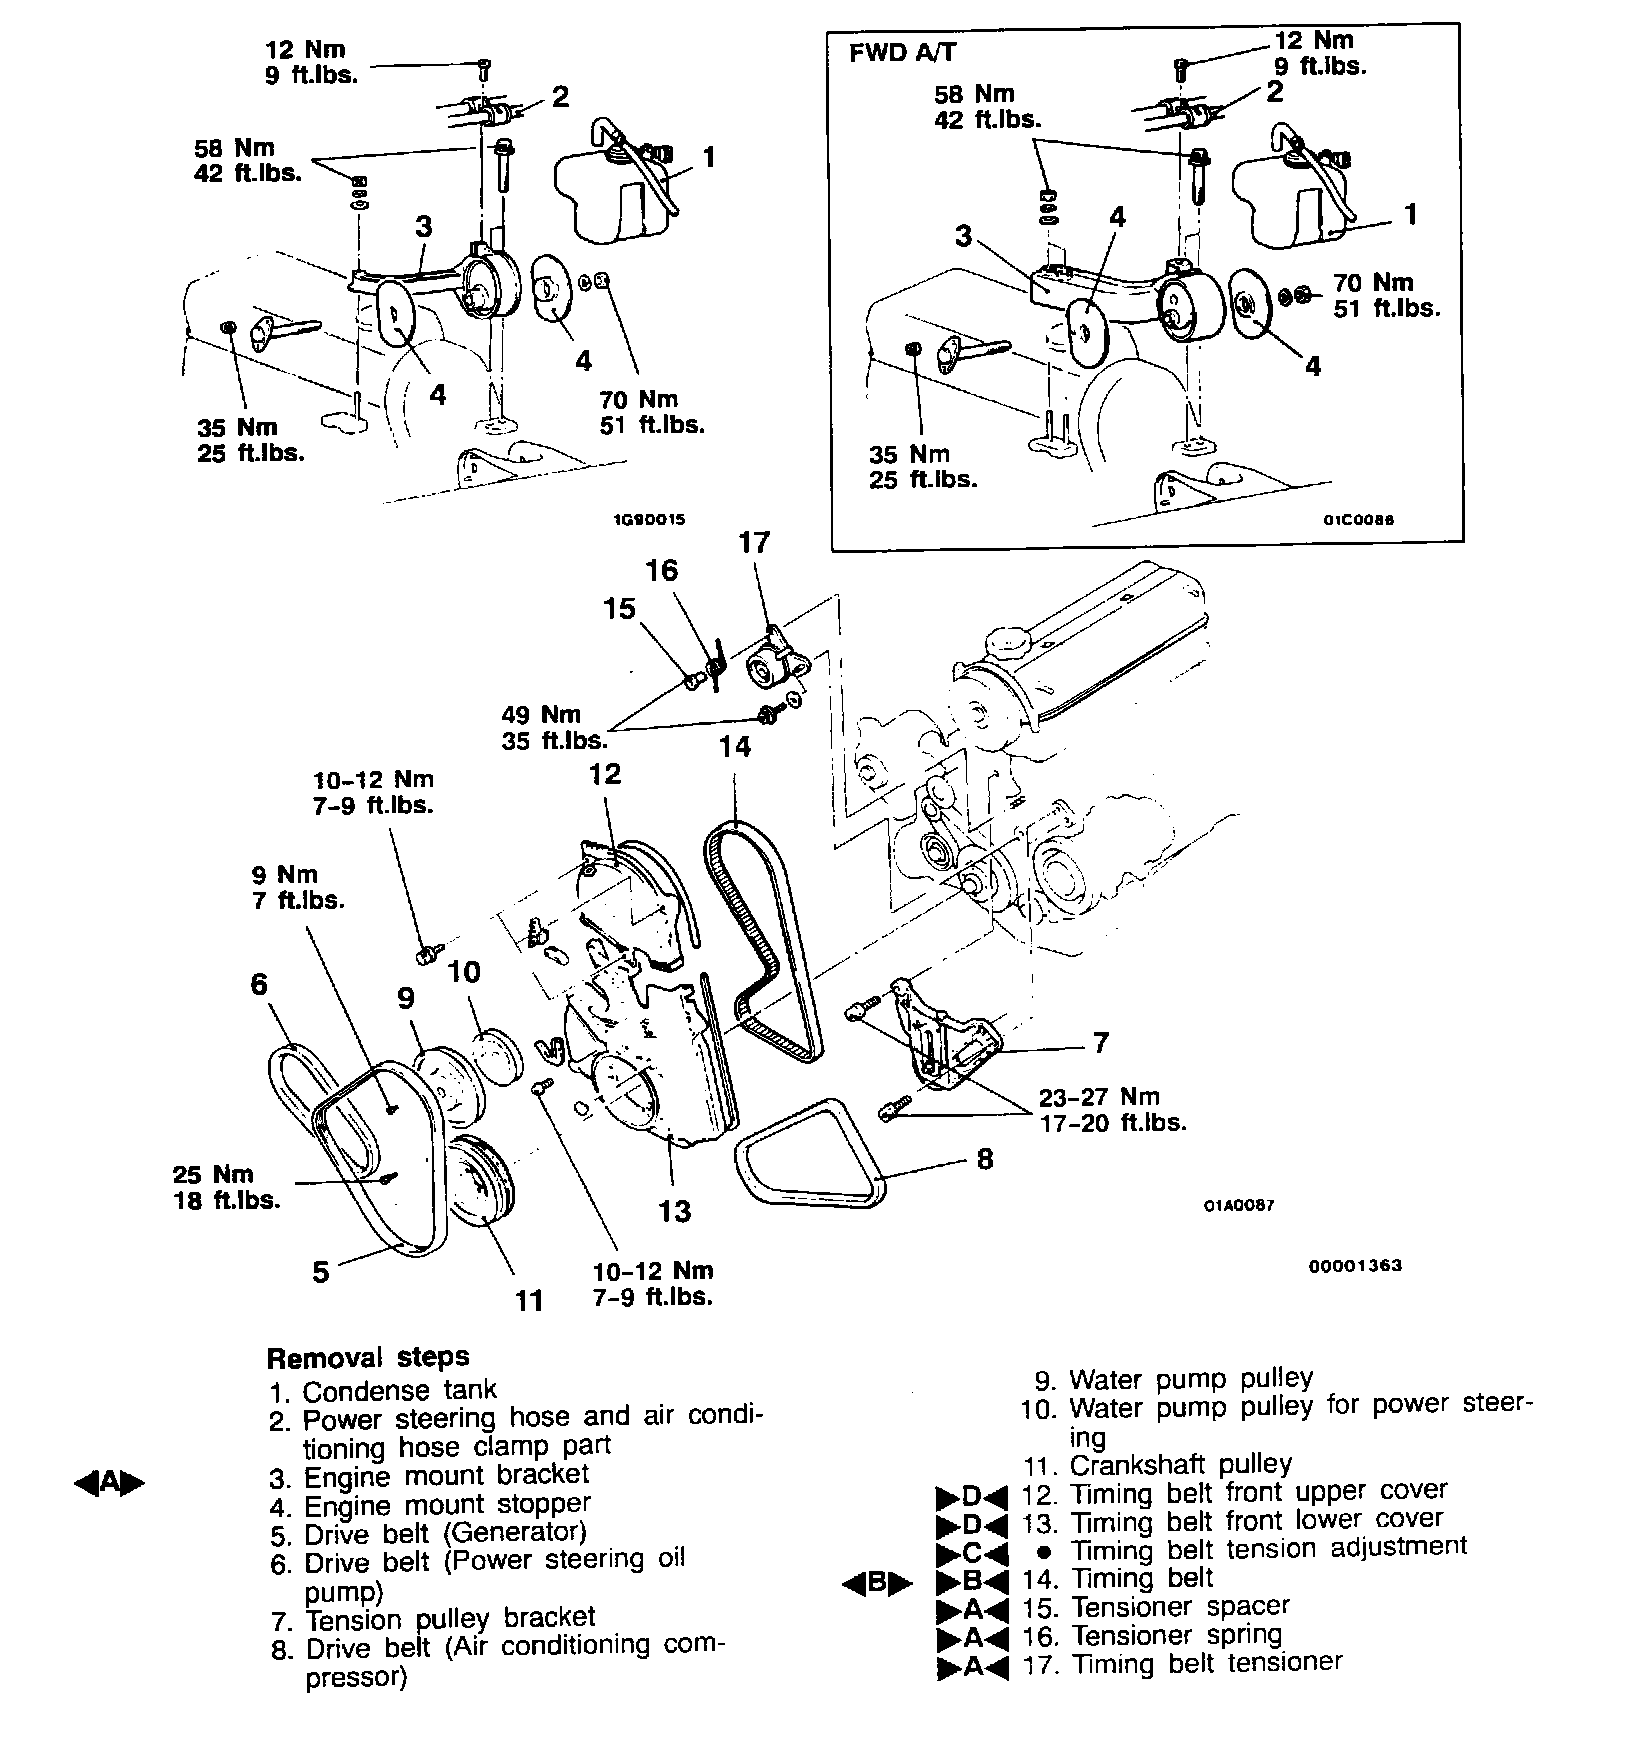
TIMING BELT (8 VALVE) REMOVAL AND INSTALLATION
Pre-removal Operation
- Removal of the under cover
REMOVAL SERVICE POINTS
"A" ENGINE MOUNT BRACKET REMOVAL
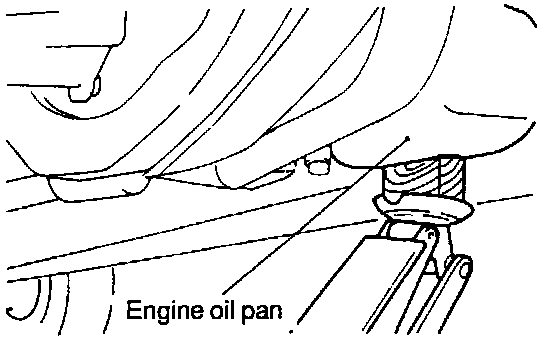
1. Place a wooden block against the engine oil pan and then jack up the vehicle.
CAUTION:
- Jack up carefully not to damage other parts.
2. Remove the engine mount bracket.
"B" TIMING BELT REMOVAL
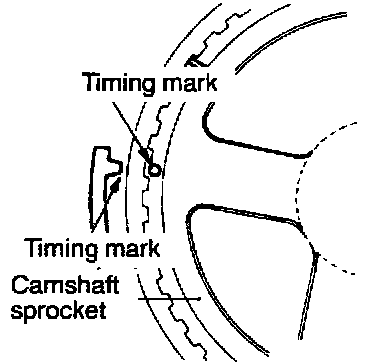
1. Turn the crankshaft clockwise and align the timing marks.
CAUTION:
- Never turn the crankshaft counterclockwise.
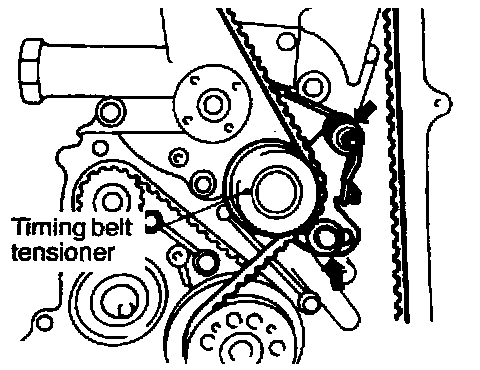
2. Loosen the timing belt tensioner bolts as shown In the figure.
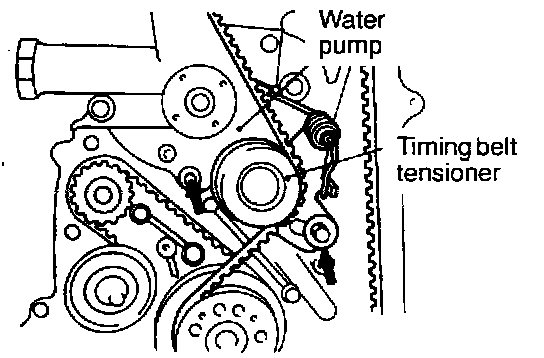
3. Move the timing belt tensioner to the water pump side and temporarily tighten the bolt so that the tensioner doesn't return.
4. Remove the timing belt.
CAUTION:
- To re-use the timing belt, chalk an arrow indicating the clockwise direction on its flat side.
INSTALLATION SERVICE POINTS
"A" TIMING BELT TENSIONER INSTALLATION
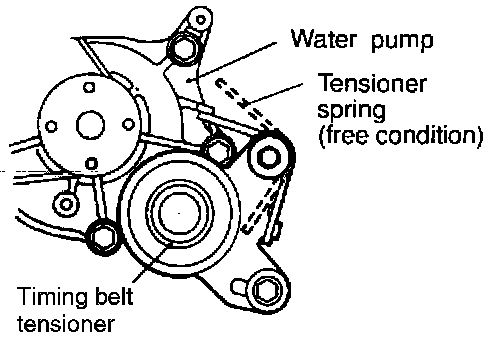
1. Install the tensioner spring, tensioner spacer and timing belt tensioner.
NOTE: At this time, keep the tensioner spring free (such condition as shown by dotted line in the illustration).
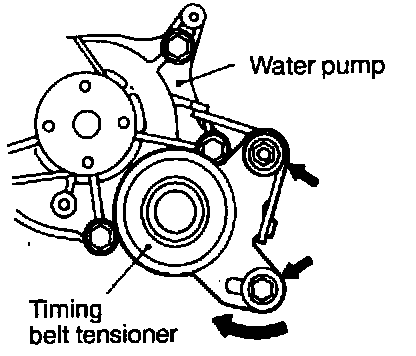
2. Place the timing belt tensioner most closely to the water pump side, and then temporarily tighten the bolts as shown in the illustration.
3. Set the tensioner spring to the specified position by using pliers, etc.
"B" TIMING BELT INSTALLATION
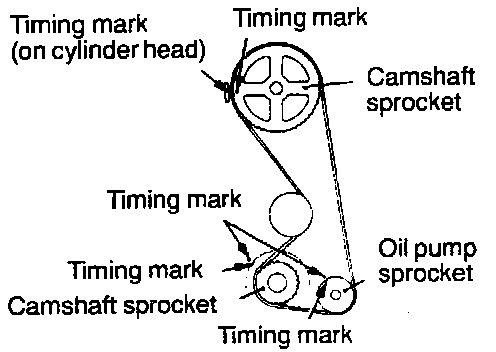
1. Align the timing marks of the camshaft sprocket, the crankshaft sprocket, and the oil pump sprocket.
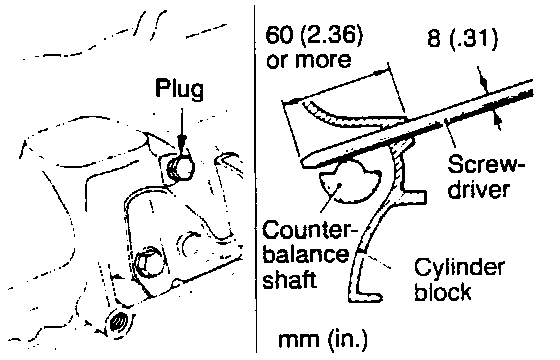
2. Remove the cylinder block plug and insert a Phillips screwdriver with a diameter of 8 mm (0.31 in.), and check that the screwdriver goes in 60 mm (2.36 in.) or more. If the screwdriver will only go 20 - 25 mm (0.79 - 0.98 in.) as it strikes against the counterbalance shaft, turn the sprocket once, realign the timing mark and check that the screwdriver goes in 60 mm (2.36 in.) or more. Do not take out the screwdriver before installing the timing belt.
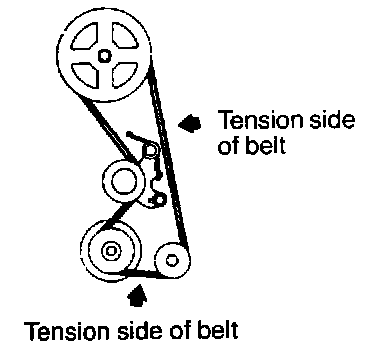
3. Install the timing belt onto the crankshaft sprocket, the oil pump sprocket and the camshaft sprocket in that order, while making sure that the tension side of the belt is not slackened.
CAUTION:
- It the timing belt is reused, install so that the arrow marked on it at time of removal is pointing clockwise.
"C" TIMING BELT TENSION ADJUSTMENT
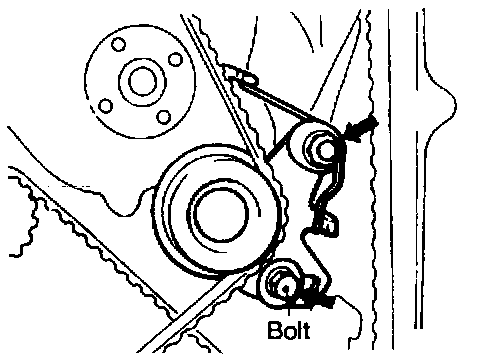
1. Initially loosen the fixing bolt of the tensioner fixed to the water pump side, use the force of the tensioner spring to apply tension to the belt.
2. Recheck the timing marks on each sprocket.
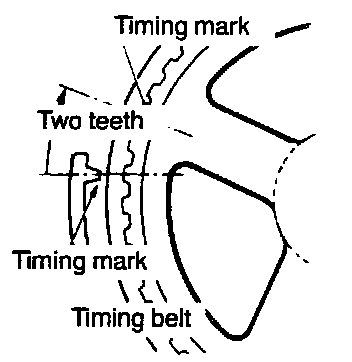
3. Turn the crankshaft clockwise by two teeth (15°) of the camshaft sprocket.
CAUTION:
- Never turn the crankshaft counterclockwise.
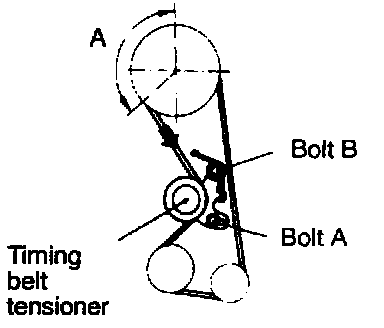
4. Apply force on the timing belt tensioner toward the direction of the arrow so that no portion of the belt raises out in portion A, place the belt on the camshaft sprocket such that the belt sprocket teeth are fully engaged.
5. Tighten the bolt A and bolt B in that order, and fix the timing belt tensioner.
CAUTION:
- Always tighten the bolt A first, or belt tension will be maladjusted.
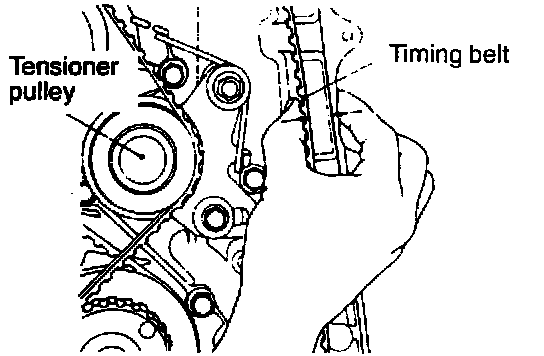
6. Grasp the center of the timing belt as shown in the illustration. Then check the clearance between the outside of the belt and the cover.
Standard value: approx. 14 mm (0.55 in.)
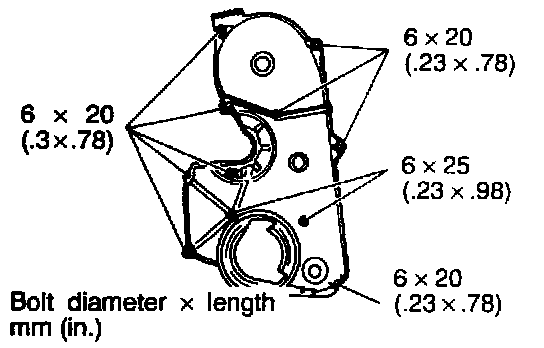
"D" TIMING BELT FRONT LOWER/UPPER COVER INSTALLATION
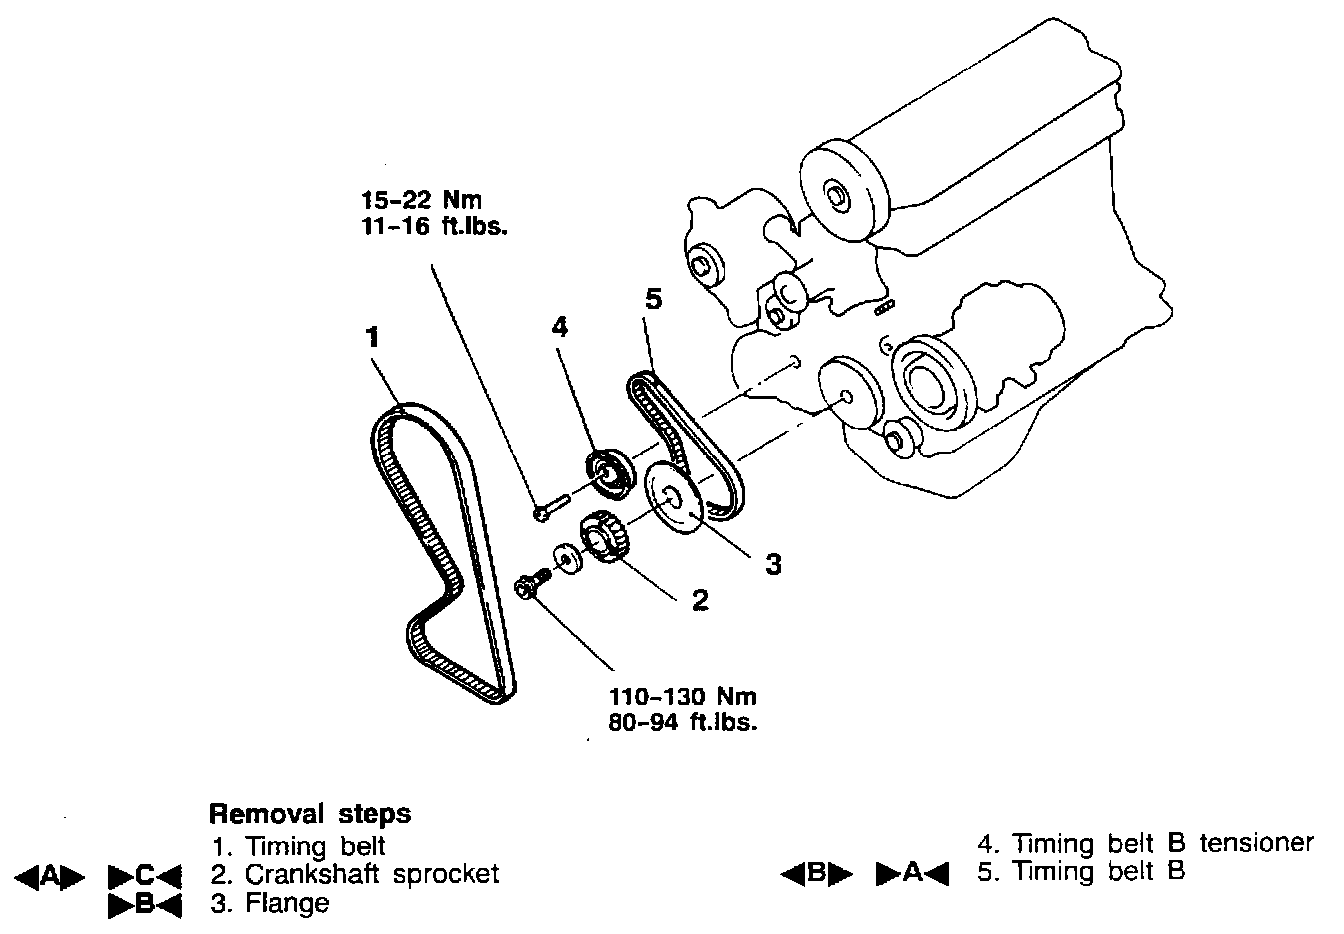
TIMING BELT "B" (8 VALVE) REMOVAL AND INSTALLATION
REMOVAL SERVICE POINTS
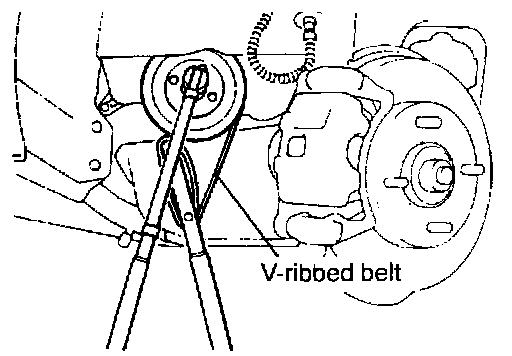
"A" CRANKSHAFT SPROCKET REMOVAL
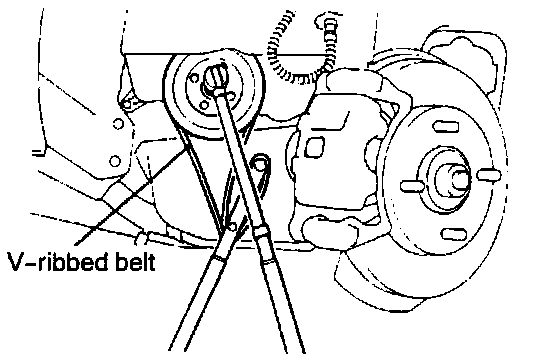
1. Detent the crankshaft pulley by using a V-ribbed belt and the general service tool.
CAUTION:
- Do not use the belt installed in the vehicle.
- Do not use a damaged belt.
2. Remove the crankshaft sprocket bolt.
3. Remove the crankshaft pulley and remove the crankshaft sprocket.
"B" TIMING BELT "B" REMOVAL
CAUTION:
- If the timing belt "B" is to be re-used, chalk an arrow indicating the clockwise direction on its flat side.
INSTALLATION SERVICE POINTS
"A" TIMING BELT "B" INSTALLATION AND ADJUSTMENT
1. Install the timing belt "B" as following procedures.
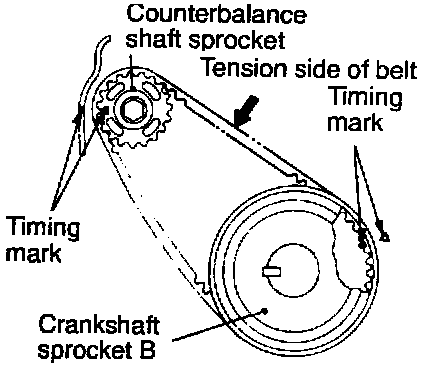
(1) Align crankshaft sprocket "B" timing mark and the counterbalance shaft sprocket timing mark.
(2) Fit timing belt "B" over crankshaft sprocket "B" and the counterbalance shaft sprocket. There must be no slack in the belt.
2. Adjust the tension of the timing belt "B" as following procedures.
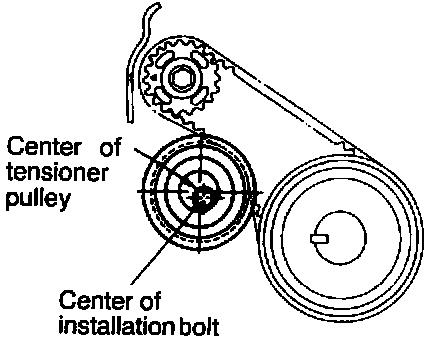
(1) Temporarily fix the timing belt "B" tensioner so that the center of the tensioner pulley is to the left and above the center of the installation bolt and that the flange is toward the front of the engine.
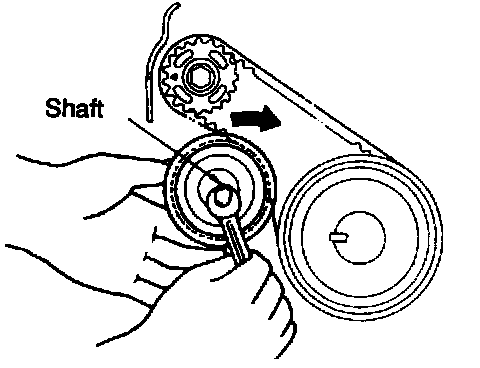
(2) Holding the timing belt "B" tensioner up with your finger in the direction of the arrow, place pressure on the timing belt so that the tension side of the belt is taut. Now tighten the bolt to fix the tensioner.
CAUTION:
- Do not let the tensioner pulley shaft rotate with the bolt. Otherwise, the belt will become too tight.
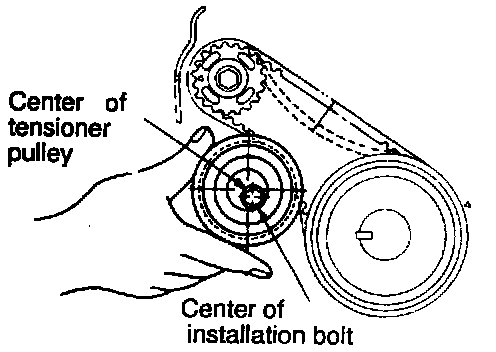
(3) Push the center of the timing belt "B" on tension side with index finger. Check the belt tension.
Standard value: 5 - 7 mm (0.20 - 0.28 in.)
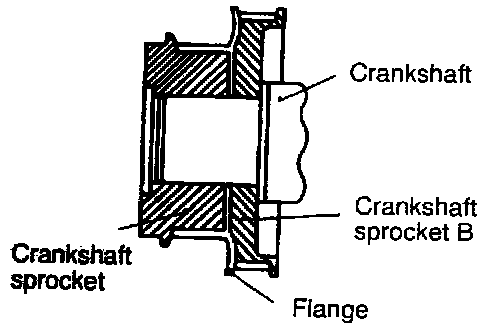
"B" FLANGE INSTALLATION
NOTE: Pay attention to its installation direction.
"C" CRANKSHAFT SPROCKET INSTALLATION
1. Install the crankshaft sprocket.
2. Install the crankshaft pulley.
3. Detent the crankshaft pulley by using the V-ribbed belt and the general service tool.
CAUTION:
- Do not use the belt installed in the vehicle.
- Do not use a damaged belt.
4. Tighten the crankshaft sprocket bolt to the specified torque.
5. Remove the crankshaft pulley.
Post-installation Operation
- Installation of the Under Cover
- Engine adjustment