Removal and Replacement
Service Information
Starter Removal, Installation, and Performance Test
Removal
1. Intake Air Duct
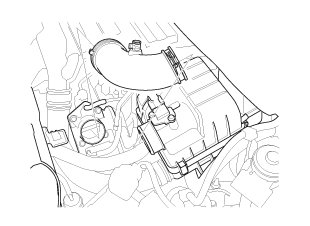
1. Remove the intake air duct.
2. Intake Air Pipe
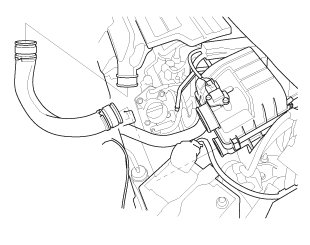
1. Remove the intake air pipe.
3. Air Cleaner
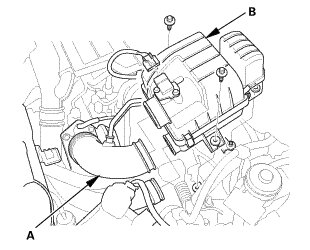
1. Disconnect the intake air duct (A) from the air cleaner (B).
2. Remove the air cleaner.
4. Starter
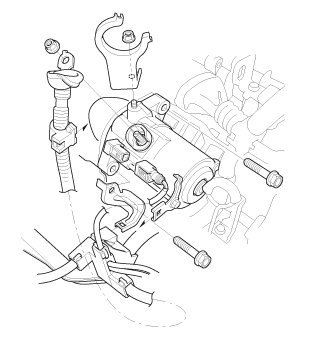
1. Disconnect the cable and the connector.
2. Remove the upper radiator hose bracket.
3. Remove the starter.
Test
1. Starter Performance - Test
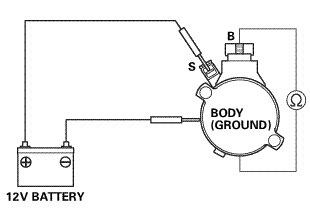
1. Clamp the starter firmly in a vise.
2. Make the connections for this test using the thickest (gauge) wire possible (preferably the same gauge as used on the vehicle).
NOTE: To avoid damaging the starter, never leave the battery connected for more than 5 seconds.
3. Connect the battery as shown, and check for continuity between the B terminal and the starter body. If there is continuity, it is working properly.
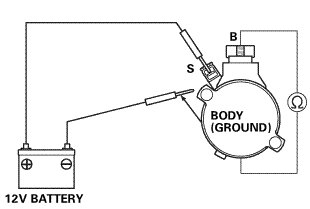
4. Disconnect the battery from the starter body, and check for continuity between the B terminal and the starter body. If there is no continuity, it is working properly.
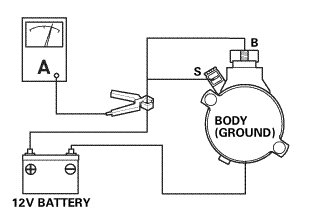
5. Connect the starter to the battery as shown, and confirm that the motor runs.
6. If the electric current meets the specification when the battery voltage is at 11.5 V, the starter is working properly.

Installation
1. Starter
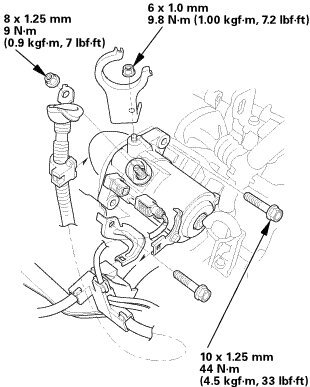
1. Install the starter.
2. Install the upper radiator hose bracket.
3. Connect the connector and the cable. Make sure the crimped side of the ring terminal faces away from the starter when you connect it.
2. Air Cleaner
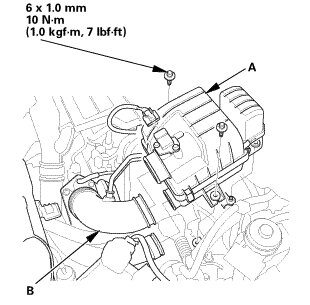
1. Install the air cleaner (A).
2. Connect the intake air duct (B) to the air cleaner.
3. Intake Air Pipe
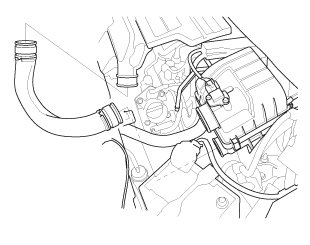
1. Install the intake air pipe.
4. Intake Air Duct
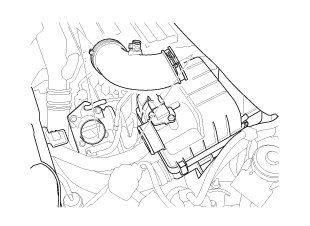
1. Install the intake air duct.