Lower Timing Chain Cover
Lower Timing Chain Cover
Special tools, testers and auxiliary items required
• Hand drill with plastic brush attachment
• Protective goggles
• Sealant, refer to the Parts Catalog
Removing
• Transmission removed.
• When installing, bring all cable ties back to same positions.
Risk of destroying electrical components.
• Observe measures for disconnecting battery.
- Disconnect the battery.
- Remove the drive plate. Refer to => [ Drive Plate ] Drive Plate.
- Remove the left and right timing chain covers. Refer to => [ Left and Right Timing Chain Covers ] Left and Right Timing Chain Covers.
- Remove the oil filter housing. Refer to => [ Oil Filter Housing ] Oil Filter Housing.
- Remove generator.
- Remove the left and right bolts - arrows - and the electrical connector bracket.
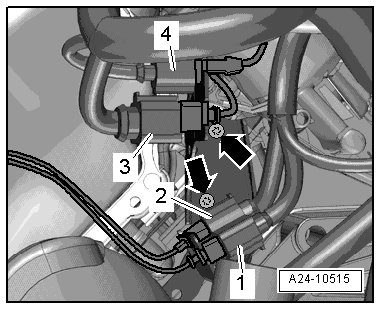
• Ignore - 1 to 4 -.
- Disconnect the starter electrical connector - 3 - by sliding the retainer back and pressing the release down.
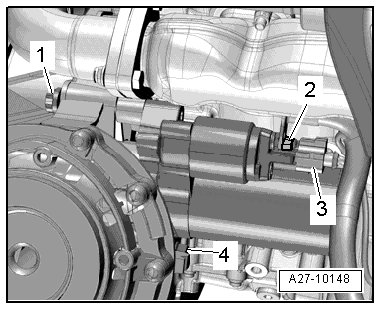
- Remove the electrical wire nut - 2 - and starter.
• Ignore - 1 and 4 -.
- Remove the bolts - arrows -.
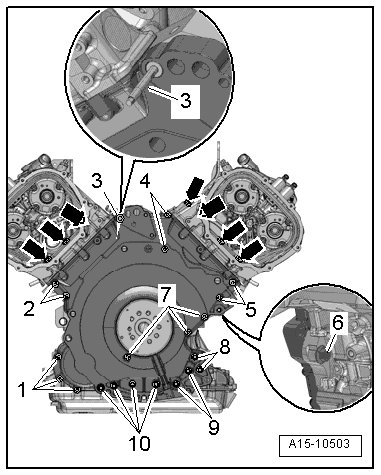
- Remove the bolts - 1 through 10 - and remove the lower timing chain cover.
- Press the transmission side of the crankshaft shaft seal out of the lower timing chain cover.
Installing
• For the correct tightening specifications, refer to => [ Lower Timing Chain Cover, Tightening Specifications and Sequence ] Timing Chain Covers Overview.
• Replace seals, gaskets and O-rings.
- Remove the upper right alignment bushing from the cylinder block.
- Grind the alignment bushing down at an angle as shown in the illustration.
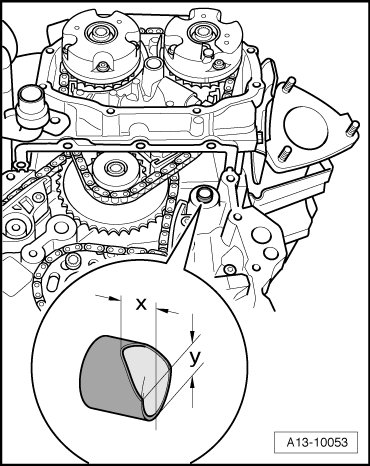
• Dimension - x - = 6.5 mm.
• Dimension - y - = 8 mm.
- Insert the alignment bushing in the cylinder block so the angled side faces up.
• Because of the chamfer, the lower timing chain cover can be positioned more easily when the cylinder head is installed.
Risk of contaminating lubricating system.
• Cover open parts of engine.
Danger of eye injury.
• Wear protective goggles.
- Remove the sealant residue on the cover for the timing chain, cylinder block and cylinder head, for example using a rotating plastic brush.
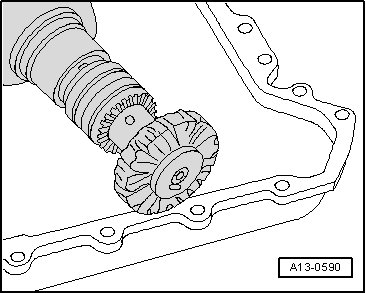
- Clean the sealing surfaces; they must be free of oil and grease.
- Clean the threaded holes in the cylinder block for connecting the engine and transmission using a thread tap before installing the transmission.
- Clean old sealant out of the holes - arrow - in the cylinder head seals.
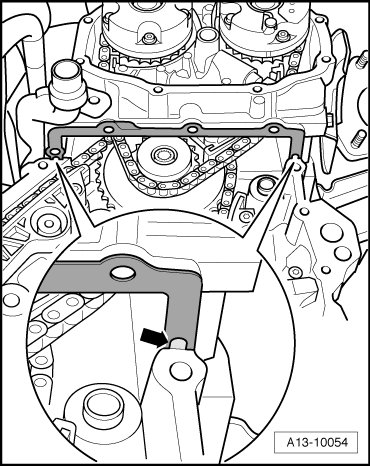
• With cylinder head installed, holes in cylinder head seal are only half visible.
The cylinder head seal could be damaged.
• Only bend the ends of the cylinder head seals slightly, do not kink.
• A kinked cylinder head seal must be replaced.
- Bend the end of the cylinder head seals down slightly - arrows - until the upper sealing surface of the seals and the cylinder head can be cleaned.
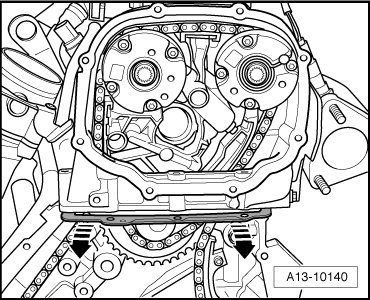
- Clean the upper and lower cylinder head gaskets; they must free from oil and grease.
• Note the expiration date of the sealing compound.
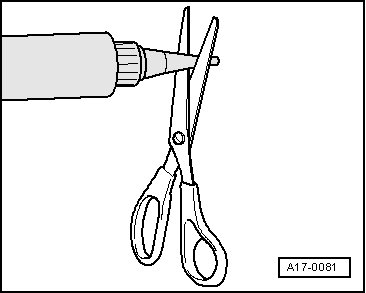
- Cut the tube nozzle at the front marking (nozzle diameter approximately 2 mm).
• The sealant must be applied to several places on the engine, as described in the following.
- Lightly coat the top and bottom cylinder head seal sealing surfaces with lubricant by bending the seals down slightly again - arrows -.
- Use a flat object such as a feeler gauge to coat the surface between the cylinder head and seal.
- Fill the cleaned cylinder head seal holes - arrow - with sealant.
The lubrication system could be plugged with excess sealant.
• Do not apply sealant bead thicker than indicated.
- Apply sealant beads - 1 through 4 - on the clean lower timing chain cover sealing surfaces as shown in the illustration.
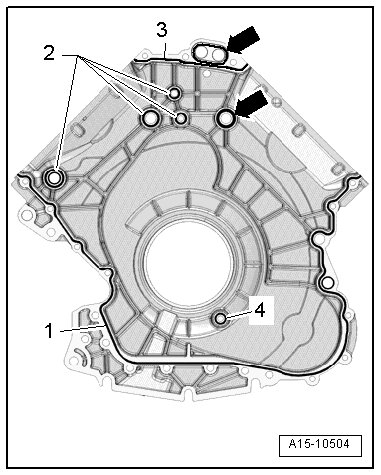
• The groove of sealing surface must be completely filled with sealant.
• The sealant beads must be 1.5 to 2.0 mm above the sealing surface.
• The sealant bead - 2 - must be drawn through as shown in the illustration even though the groove is intermittent.
• The sealant only needs to cure for approximately 5 minutes after applying.
- Insert the seals - arrows - in the grooves on the lower timing chain cover.
- Position the lower timing chain cover, guiding it diagonally from below to the sealing surface on the cylinder block and cylinder head.
- When positioning, ensure the cylinder head seals are not damaged.
- Tighten the bolts for the lower timing chain cover. Refer to => [ Lower Timing Chain Cover, Tightening Specifications and Sequence ] Timing Chain Covers Overview.
Install in reverse order of removal paying attention to the following:
- Install starter.
- Install generator.
- Install the oil filter housing. Refer to => [ Oil Filter Housing ] Oil Filter Housing.
- Install the left and right timing chain covers. Refer to => [ Installing ] Left and Right Timing Chain Covers.
- Install the transmission-side crankshaft shaft seal. Refer to => [ Crankshaft Seal, Transmission Side ] Service and Repair.
- Installing the drive plate. Refer to => [ Drive Plate ] Drive Plate.