Windshield Overview
Windshield Overview
• On vehicles equipped with lane assist, the camera must be re-calibrated if the windshield has been replaced.
• The windshield projection head up display control module (J898) must be calibrated if the windshield on a vehicle with windshield projection is replaced.
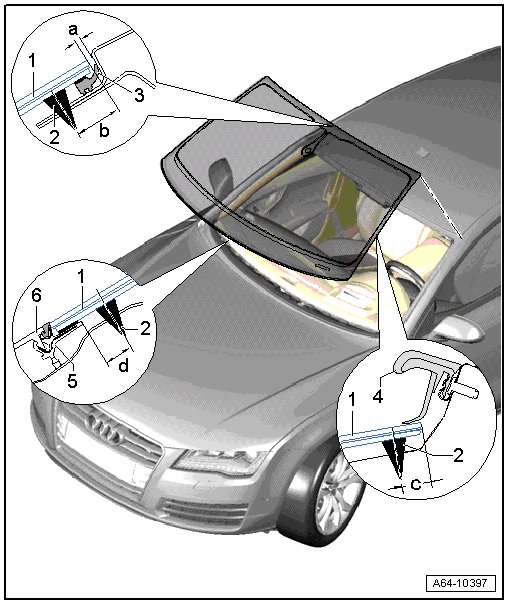
1 Windshield
• Distance to the roof, dimension - a - = 2 mm.
• Align the side distance - c -.
2 Adhesive Sealing Material
• Observe minimum curing time. Refer to => [ Minimum Curing Time ] Flush-Bonded Windows.
• Dimension - b - = 17 mm +/- 2 mm
• Dimension - d - = 8 mm +/- 2 mm
• Dimension - e - = 12 mm +/- 2 mm
3 Gap Cover
• Replace
4 Drip Rail
5 Plenum Chamber Cover Molding
• No replacement part.
• With a new window, protective piping must first be removed before installing plenum chamber cover.
6 Plenum Chamber Cover
• Press into retaining strip only after window adhesive minimum curing time is complete (3 hours).
Water Deflector, Removing
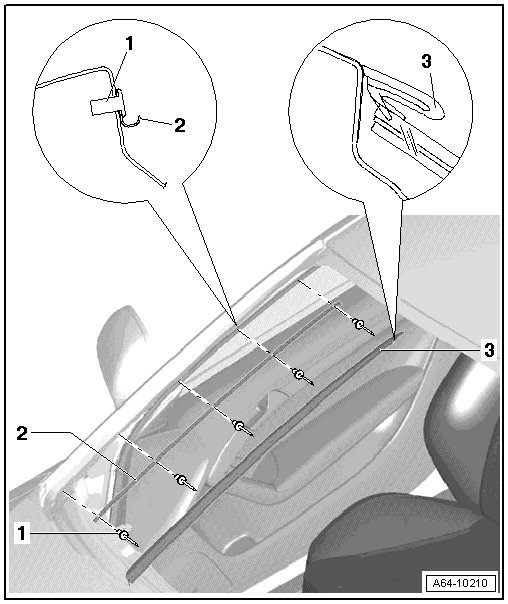
1 Pop Rivet
• Quantity: 5
• Rivet the guide rails beginning at the top.
2 Guide Rail
• To remove, drill out rivet heads - 4 - and drive out rivet shafts.
3 Drip Rail
• Press into the guide rail as far as the stop, beginning at the top and working toward the bottom.
• Check for flushness at the transition to the A-pillar.
Cover Profile, Replacing
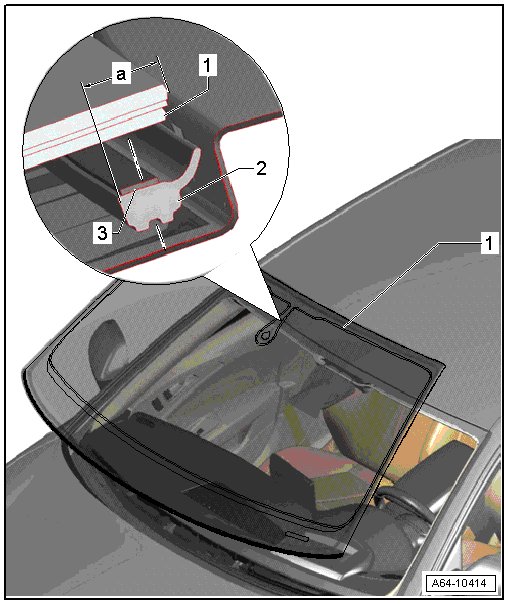
1 Windshield
• Removed
2 Cover Profile
- Before installing new cover profile, remove residue completely using a commercially available window scraper to avoid damaging ceramic screen printed area.
- Clean adhesion area with cleaning solution D 009 401 04.
- Apply on to interior of window using, for example, a soft pencil at a distance - a - = 8 mm from upper window edge.
- Prime adhesion surface with D 009 200 02 up to marking applied earlier and let it air dry for at least 10 minutes.
- Press cover profile onto window centered with rear edge to end of priming (pencil marking).
- Reinstall window.
Installing The Cover Strip
- Windshield - 1 - with ceramic coating.
- Clean adhesion area with cleaning solution D 009 041 04.
- Now apply a marking at uniform distance - a - = 8 mm to top of window edge.
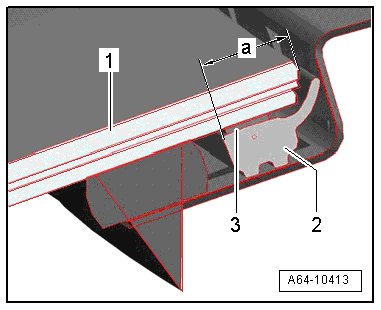
- Apply glass/paint primer D 009 200 02 cleanly up to marking.
- Let the glass/paint primer air out for at least 10 minutes.
- Remove protective foil from double-sided adhesive tape - 2 - for side impact molding.
- Place cover profile - 3 - onto window centered with rear edge to end of priming (marking).
- Press on profile firmly onto window using a application roller.
Removing Protective Piping
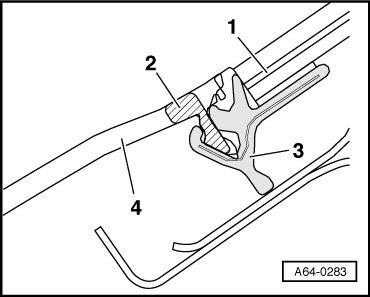
- With a new windshield - 1 -, protective piping - 2 - must be removed from molding - 3 - before installing plenum chamber cover - 4 -.