Sound Proofing / Insulation: Service and Repair
Noise Insulation Assembly Overview
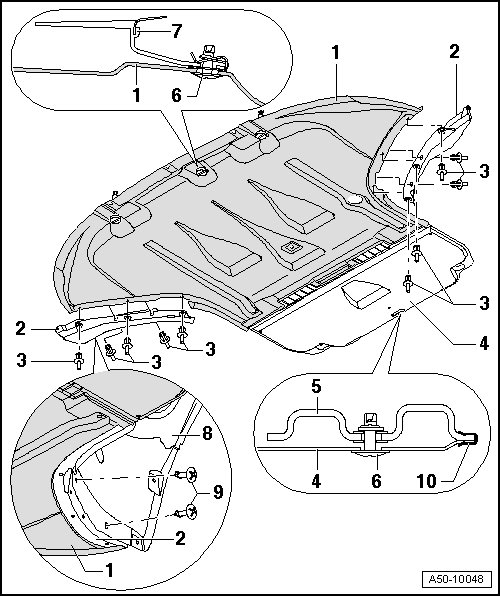
1 Noise insulation, front
• Remove two end pins on each wheel housing liner
• To remove, remove front and rear quick release screws.
• Remove noise insulation rearward under bumper cover.
• Remove noise insulation forward with wheel spoilers.
2 Wheel spoiler
• To remove, disengage expanding clip by pressing clamping pins.
3 Clamping pin
• 5 pieces per wheel spoiler
4 Rear noise insulation
5 Subframe
6 Quick release screw
• For lock carrier service position, remove quick release screws only on lock carrier. Radiator Support
• quantity: 3
7 Lock carrier with attachments
8 Wheel housing liner
9 End pins
• When removing, remove front noise insulation.
• 2 times left and right on each wheel housing liner.
10 Retaining clip
Rear Noise Insulation
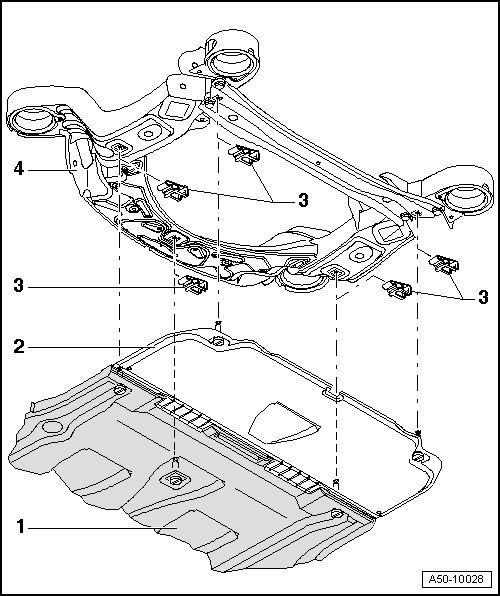
1 Noise insulation, front
2 Rear noise insulation
• To remove, open the rear quick-release fastener on the front noise insulation.
• Remove the rear quick-release fasteners from the rear noise insulation.
3 Spring nut
• Inserted sideways in subframe.
4 Subframe