Shift Mechanism Function Unit
Shift Mechanism Function Unit
Special tools, testers and auxiliary items required
• Socket and Key (T40031)
Removing
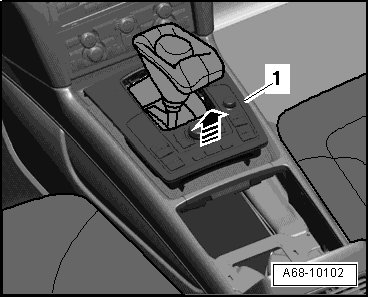
- Remove the knob from the selector lever. Refer to => [ Selector Lever Knob ] Selector Lever Knob.
- Remove the frame with the multimedia system control head (E380) - 1 -.
- Disconnect the connector - 1 -.
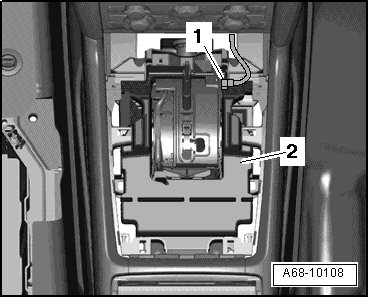
- Remove the noise insulation - 2 - from the shift housing.
- Remove the front ashtray/front storage compartment.
- Remove the bolts - arrows - and - 1 - from the center console bracket.
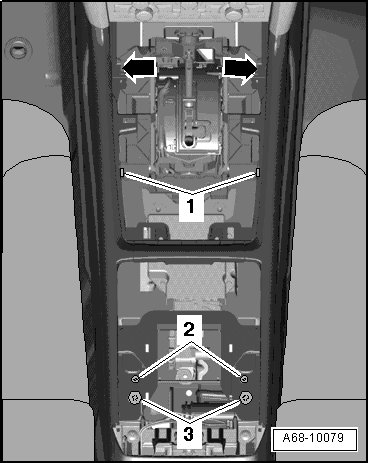
- Disconnect the connector - 1 -.
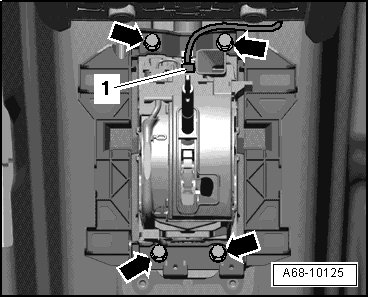
- Remove the four center console bracket bolts - arrows -.
- Remove the four bolts - arrows -.
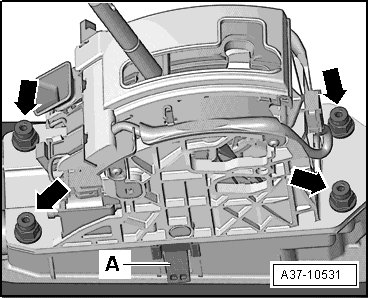
• To provide a better illustration, shown here without the center console bracket.
- Tip the selector mechanism function unit and remove the center console bracket.
- Press the parking lock button - C - down and hold.
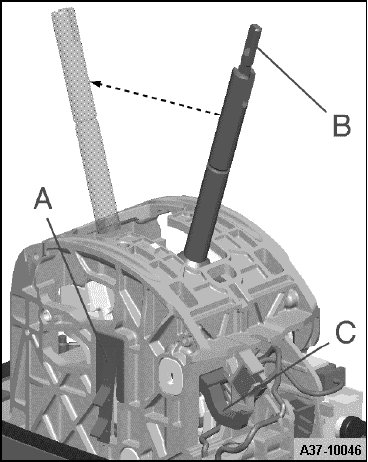
- Pull the selector rod - B - upward and move the selector lever all the way - arrow - into "S".
• Ignore - A -.
• Selector mechanism is shown from the front in the illustration.
- Raise the selector mechanism function unit.
• Do not bend the selector lever cable.
- Remove the adjusting bolt - 1 - through the opening at the top of the selector mechanism - arrow - using (T40031).
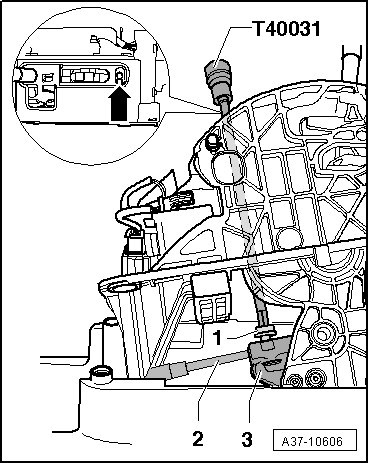
- Remove the retainer plate - 2 - downward, from the selector lever cable - 1 -.
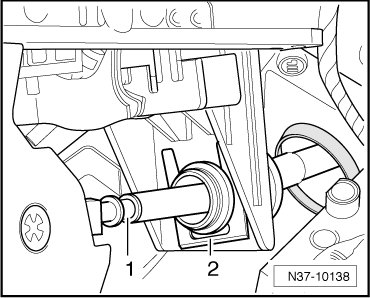
- Remove the selector mechanism function unit upward.
Installing
Install in reverse order, paying attention to the following:
• Tightening specifications, refer to => [ Selector Mechanism Overview ] Selector Mechanism Overview.
• Do not bend the selector lever cable.
• Lubricate the bearings and the sliding surfaces with poly lubricant (G 052 142 A2).
• Selector lever in the "S" position.
If the Selector Mechanism Function Unit was Replaced:
• A new selector mechanism function unit does not have the selector lever joint - 3 -. The joint from the old selector mechanism function unit must be transferred to the new unit.
- Pull the plastic retaining spring - 2 - forward slightly and remove the pin- 3 - upward - arrow -.
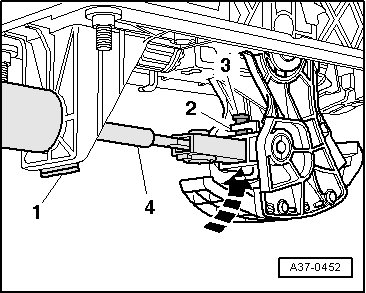
- Remove the selector lever joint and install the new selector mechanism.
- Install the pin - 3 - from the top and push it down.
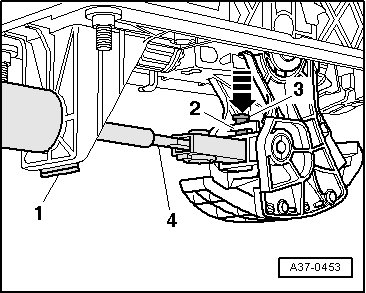
• The plastic retaining spring - 2 - must lock the pin - 3 - and keep it from falling out.
Continuation for All:
- Slide the selector lever cable into the selector mechanism function unit.
- Insert the end of the selector lever cable - 2 - into the selector lever joint - 3 -.
- Install the adjusting bolt - 1 - through the opening at the top of the selector mechanism - arrow - using (T40031).
- Secure the selector lever cable - 1 - with the new retainer plate - 2 -.
• Installed position: The angled end of the retainer plate should point towards the rear.
- Insert both hooks - A - into the lower section of the selector mechanism function unit.
- Mount the selector mechanism function unit on the lower section.
• Do not bend the selector lever cable.
- Tip the function unit and at the same time install the center console bracket.
- Install the bolts - arrows -.
- Connect the connector - 1 -.
- Install the center console bracket.
- Install the noise insulation - 2 - in the shift housing.
- Connect the connector - 1 - to the selector lever sensor system control module with the Tiptronic switch.
- Install the front ashtray/front storage compartment.
- Install the frame with the multimedia system control head - 1 -.
- Install the knob on the selector lever. Refer to => [ Selector Lever Knob ] Selector Lever Knob.
- Adjust the selector lever cable, refer to => [ Selector Lever Cable, Adjusting ] Service and Repair.
- Check the selector mechanism, refer to => [ Selector Mechanism, Checking ] Testing and Inspection.