Driver Seat, Bringing Into Service Position
Driver Seat, Bringing Into Service Position
Service Position, Implementing
- Remove rear seat track covers from driver seat. Refer to => [ Seat Rail Covers ] Seat Rail Covers.
- Move seat as far back and up as possible.
Remove front trim - A - under driver seat as follows
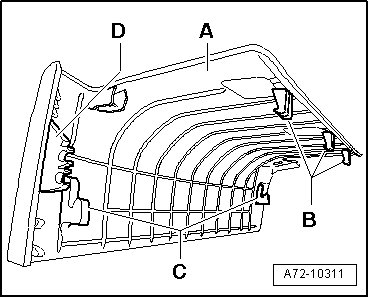
• To avoid damaging front trim - A -, trim catches (locking tabs - B -, - C - and - D -) are shown in illustration.
- Carefully raise trim - A - in locking tab area "B" () - direction of arrow -.
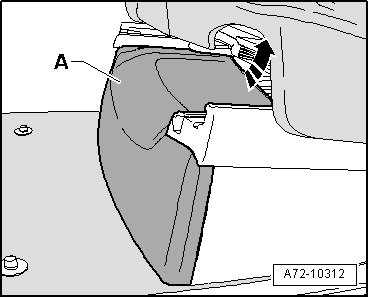
- Then press trim - A - in front area down and at the same time, pull it forward - direction of arrow -. In this way, release locking tabs "C" and "D" ().
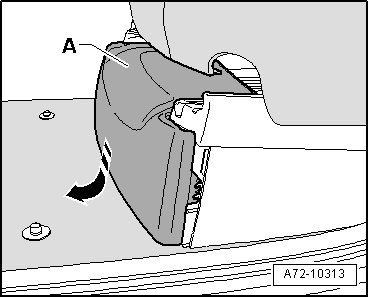
- Unclip covers - 1 - and - 2 -.
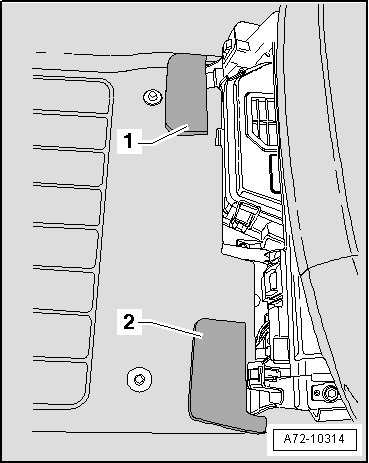
- Remove driver side console screws - arrows -.
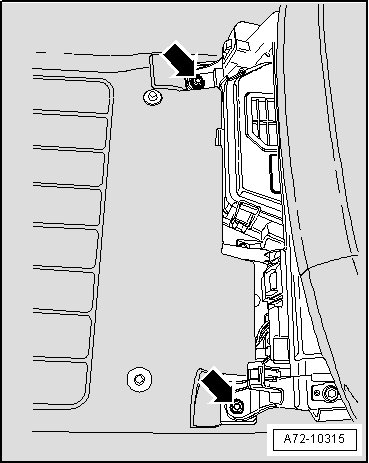
- Move seat forward.
- Fold driver seat console together with seat back. Unclip electrical wiring cord grip from seat.
Ensure seat remains in service position and does not tip forward unintentionally.
• Do not disconnect electrical wires.
Service Position, Resetting
Install in reverse order of removal. Note the following:
• Driver seat console screws are micro-encapsulated and must be replaced each time they are removed.
• Before installing the new screws, the threads of the corresponding nuts must be cleaned.
• If cover clamps remain in body mounting points, remove these and insert them in cover.
• Check clamps for damage or deformation, replace if necessary.
- When repositioning driver seat with console, clip electrical wiring cable grip onto seat.
• Tightening specifications, refer to => [ (Item 1) Screw, Self-Locking ] Driver Seat Bracket Overview.