Lower Timing Chain Cover
Lower Timing Chain Cover
Special tools, testers and auxiliary items required
• Old oil collecting and extracting device (V.A.G 1782 )
• Hand drill with plastic brush attachment
• Protective glasses
• Sealant
Removing
• Transmission removed.
- Manual Transmission Remove clutch pressure plate. Refer to => Manual Transmission/Transaxle [1][2]Manual Transmission/Transaxle and dual mass flywheel => [ Dual Mass Flywheel ] Dual Mass Flywheel.
- Vehicles with multitronic transmission: Remove damper unit. Refer to => [ Damper Unit ] Damper Unit and flywheel => [ Flywheel ] Flywheel.
- Vehicles with automatic transmission: Remove drive plate => [ Dual Mass Flywheel ] Dual Mass Flywheel.
• After removing transmission, the engine is supported by engine support bridge (10-222 A) and the torque support stop is loosened.
CAUTION!
For the further sequence of work, it must be made sure that the lock carrier is installed.
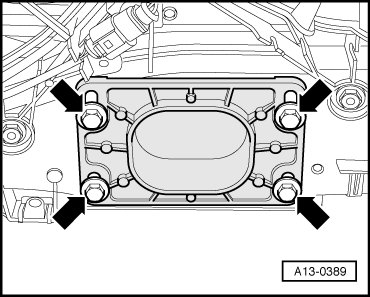
- To remove transmission, remove attached engine support bridge (10-222 A) from engine.
- Tighten torque support stop to 28 Nm - arrows -.
- Remove left and right timing chain covers. Refer to => [ Left and Right Timing Chain Covers ] Left and Right Timing Chain Covers.
• Place a rag under oil filter housing to catch escaping engine oil.
- Disconnect electrical harness connector from Oil Pressure Switch (F1) - arrow -.
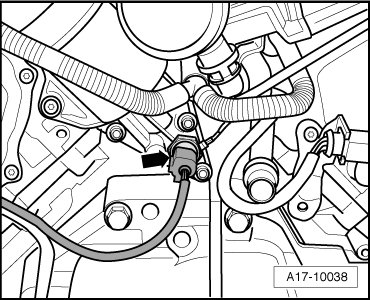
- Remove oil pressure switch.
- Extract engine oil using old oil collecting and extracting device (V.A.G 1782) from oil filter housing.
- Remove bolts - arrows -.
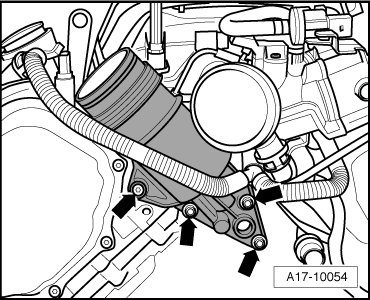
- Remove oil filter housing.
- Place old oil collecting and extracting device ( V.A.G 1782) under engine.
- Drain engine oil.
Vehicles through 04.2005:
- Remove bolts - arrows -.
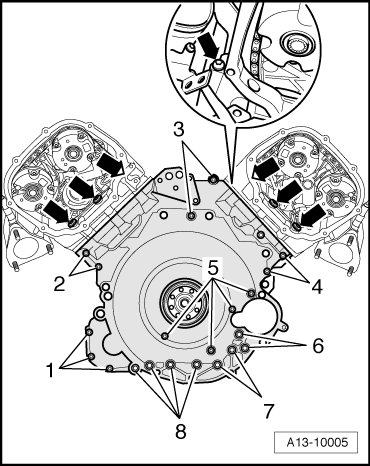
- Remove bolts - 1 to 9 - and remove lower timing chain cover.
Vehicles from 05.2005:
- Remove bolts - 1 to 9 - and remove lower timing chain cover.
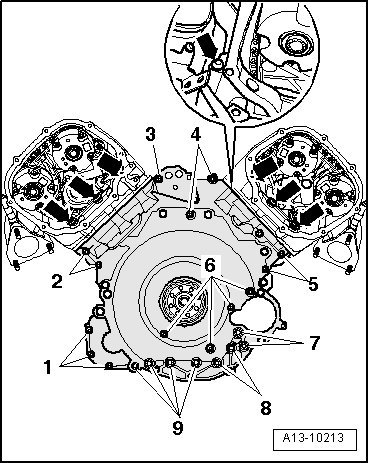
All:
- Press rear crankshaft seal out of lower timing chain cover.
Installing
• Replace gaskets, seals and O-rings.
- Pull alignment bushing out of top right of cylinder block.
- Chamfer alignment bushing with a file, as shown in the illustration.
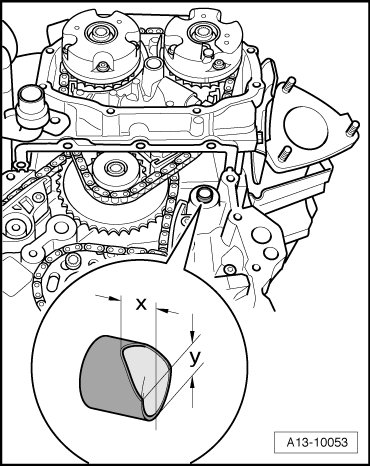
• Dimension - x - = 6.5 mm.
• Dimension - y - = 8 mm.
- Install alignment bushing into cylinder block so that the chamfered side faces upward.
• The chamfer simplifies installation of the lower timing chain cover with cylinder head installed.
CAUTION!
Wear safety glasses.
- Using e.g. a rotating plastic brush, remove sealant residue on timing chain cover, cylinder block and head.
CAUTION!
Make sure that no sealant residue enters the engine.
- Clean sealing surfaces so they are completely free of any oil or grease.
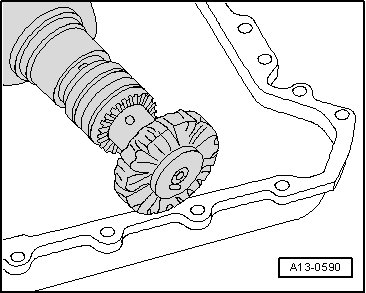
- Clean old sealant from holes - arrow - in cylinder head gaskets.
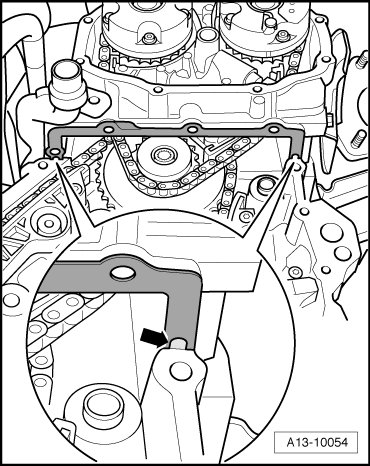
• With the cylinder head installed only half of the holes in the cylinder head gasket are visible.
CAUTION!
Cylinder head gasket must not be kinked. A kinked cylinder head gasket must be replaced.
- Bend ends of the cylinder head gaskets very slightly downward - arrows - until upper sealing surface of the gasket and cylinder head can be cleaned.
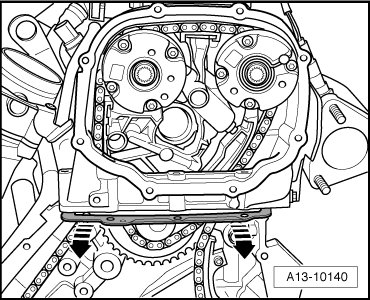
- Clean both cylinder head gaskets, top and bottom, so they are completely free of any oil or grease.
- Cut tube nozzle at front marking (jet dia. approximately 2 mm).
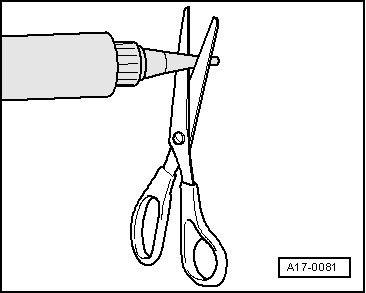
• The sealant must be applied to several places on the engine, as described in the following.
• The curing time for the sealant after application is only approximately 5 minutes.
CAUTION!
Cylinder head gasket must not be kinked. A kinked cylinder head gasket must be replaced.
- Coat sealing surfaces of the cylinder head gaskets, top and bottom, with a thin layer of sealant, slightly bending the cylinder head gaskets downward again to do this.
- To coat surface between cylinder head and gasket, use a flat object, e.g. a feeler gauge.
- Fill cleaned holes - arrow - in the cylinder head seal with sealant.
Vehicles through 04.2005:
- Apply sealant beads - 1 to 6 - on clean sealing surfaces of lower timing chain cover, as shown in illustration.
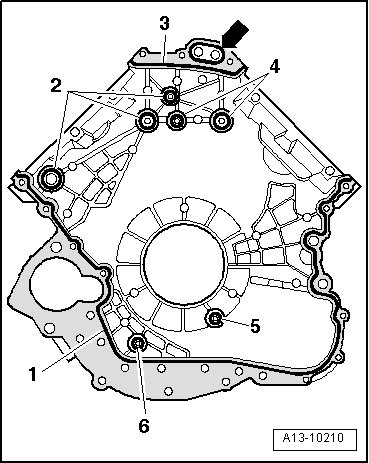
• The groove of sealing surface must be completely filled with sealant.
• Sealant beads must be 1.5 to 2.0 mm above sealing surface.
• The sealant bead - 3 - must be pulled through as shown in the illustration even though the groove is intermittent.
- Lay O-ring - arrow - in lower timing chain cover groove.
- Secure O-ring with some sealant.
- Set lower timing chain cover in place, guiding the cover at an angle from below onto sealing surface of the cylinder block and cylinder head.
- When installing, make sure that the cylinder head gaskets do not become damaged. A damaged gasket must be replaced.
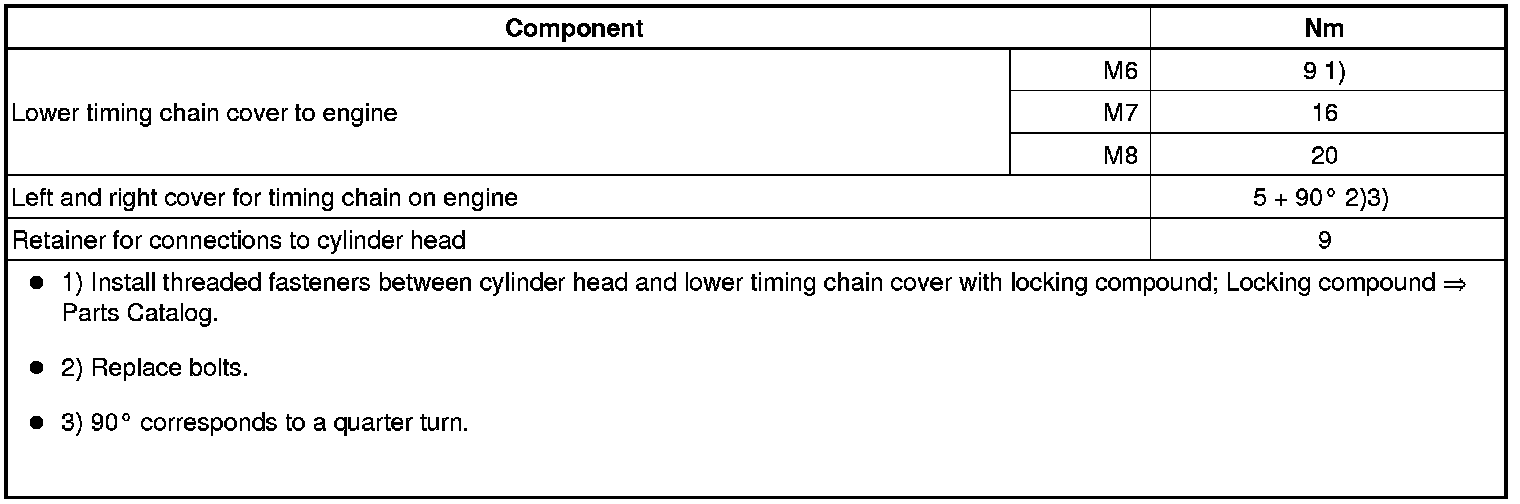
- Tighten bolts as follows:
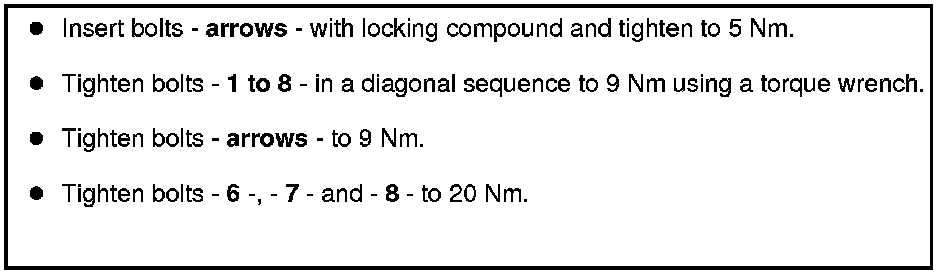
- Then immediately install oil filter housing. Refer to => [ Oil Filter Housing ] Oil Filter Housing.
Vehicles from 05.2005:
- Apply sealant beads - 1 to 5 - on clean sealing surfaces of lower timing chain cover, as shown in illustration.
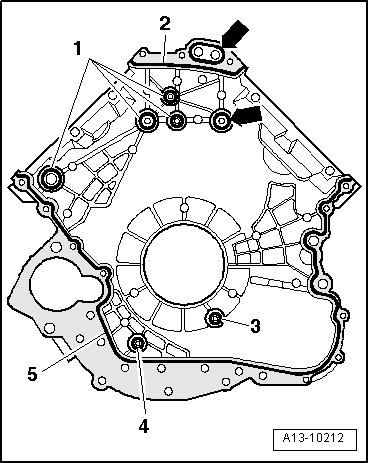
• The groove of sealing surface must be completely filled with sealant.
• Sealant beads must be 1.5 to 2.0 mm above sealing surface.
• The sealant bead - 2 - must be pulled through as shown in the illustration even though the groove is intermittent.
- Insert seals - arrows - in lower timing chain cover grooves.
- Set lower timing chain cover in place, guiding cover at an angle from below onto sealing surface of the cylinder block and cylinder head.
- When installing, make sure that the cylinder head gaskets do not become damaged. A damaged gasket must be replaced.
- Tighten bolts as follows:
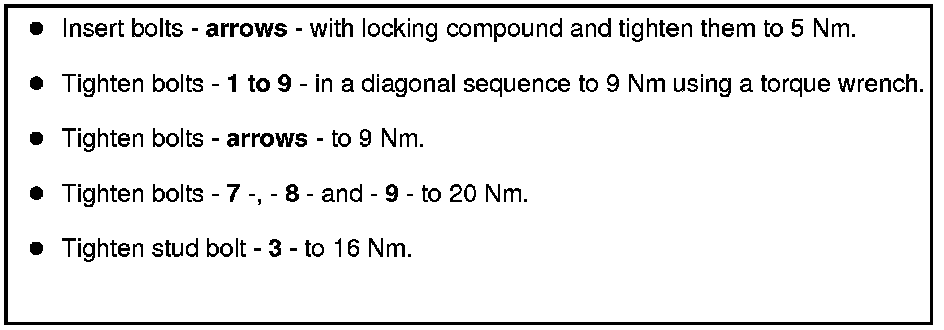
All:
Further installation is in reverse order of removal, noting the following:
- Install oil filter housing. Refer to => [ Oil Filter Housing ] Oil Filter Housing.
- Install left and right timing chain covers. Refer to => [ Installing ] Left and Right Timing Chain Covers.
- Install crankshaft seal, timing chain side. Refer to => [ Crankshaft Seal, Timing Chain Side, Replacing ] Crankshaft Seal, Timing Chain Side, Replacing.
- Manual Transmission. Install dual mass flywheel. Refer to => [ Dual Mass Flywheel ] Dual Mass Flywheel and clutch pressure plate => Manual Transmission/Transaxle [1][2]Manual Transmission/Transaxle
- Vehicles with multitronic transmission: Install flywheel. Refer to => [ Flywheel ] Flywheel and damper unit => [ Damper Unit ] Damper Unit.
- Vehicles with automatic transmission: Install drive plate. Refer to => [ Drive Plate ] Drive Plate.
- Add engine oil and check oil level.
Tightening Specifications