Lane Change Assistance Control Modules, Calibrating
Lane Change Assistance Control Modules, Calibrating
Special tools, testers and auxiliary items required
• Calibration tool for lane changing assist (VAS 6350)
• Vehicle diagnosis, testing and information system (VAS 5051B)
Conditions
- The lane change assistance control module must be calibrated in the "Guided Fault Finding" or "Guided Functions" operating mode with the (VAS 5051B) under the following conditions:
• The lane change assistance control module (J769) or lane change assistance control module 2 (J770) was replaced.
• The rear bumper was damaged.
• The rear bumper was removed and installed.
• The DTC "no or incorrect basic setting/adaptation" is stored in the DTC memory.
Procedure
- Place vehicle on a solid, level surface.
- Activate parking brake - vehicle must not move during measurement.
- Place front wheels in straight-ahead position - steering wheel in 0 position.
- Connect the (VAS 5051B).
• If a malfunction message appears in the display, refer to the (VAS 5051B) operating instructions.
- Switch on ignition.
- Remove sticker with metal foil from bumper cover if necessary.
- Secure three SW 19 wheel bolt adapters for wheel bolts on each Wheel Center Sensor (VAS 6350/1).
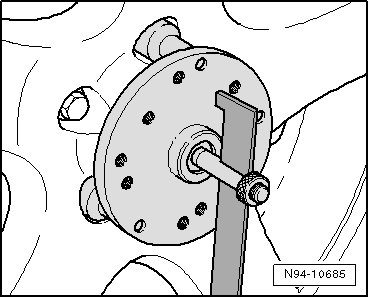
- Insert measuring paddle on both (VAS 6350/1) and secure with lock nut.
- Place (VAS 6350/1) on wheel bolts on both rear wheels.
• Wheel center sensor rotation center must be in wheel rotation center.
• Place (VAS 6350/1) on wheels so that anti-theft wheel bolts are not connected with wheel center sensor.
- Adjust measuring paddle with aid of lock nuts so that they move freely just above the floor.
• The measuring paddles must move easily.
• The measuring paddles must be vertical.
- Position (VAS 6350) at distance - a - from rear wheels.
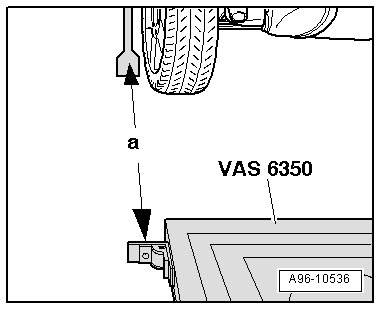
• Dimension - a - = 1,700 mm
- Switch distance laser (VAS 6350/2) on with ON button.
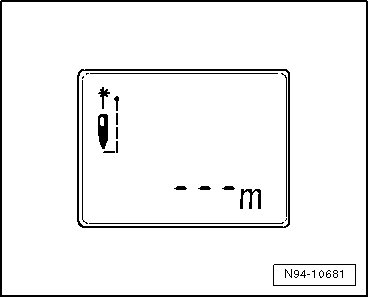
Display on (VAS 6350/2):
• "- - - m"
• Laser is switched on at same time.
- For distance measurement, hold (VAS 6350/2) - item 2 - flush to catch bracket as shown in illustration.
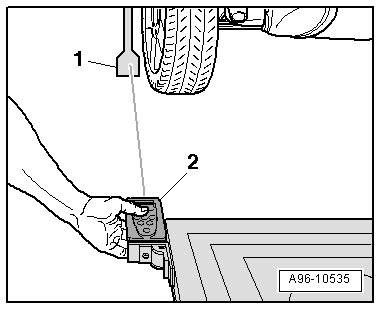
• The (VAS 6350/2) lie firmly against catch bracket.
- Make sure the laser beam for the distance measurement contacts the paddle on lower enlarged part - 1 -.
If this is not the case, measure paddle height must be corrected using lock nuts on (VAS 6350/1).
- Briefly press ON button for distance measurement.
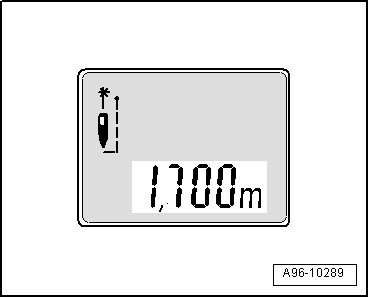
Display on (VAS 6350/2):
• "1,700 m" (specified value: 1,700 ± 2 mm).
- Repeat the measurement procedure from the right catch bracket to the right rear wheel.
• The distance value must be the same on both sides.
If both measured values are not the same, adjust (VAS 6350) accordingly.
- Select the function or path:

• The version of the lane change assistance software is displayed (versions: SWA1.0 or SWA1.5).
• This information for adjusting the calibration device is important for later steps in the procedure to avoid malfunctions.
- Secure lane change assistance calibration device lane change assistance calibration device (VAS 6350/4) at left rear of (VAS 6350) mount.
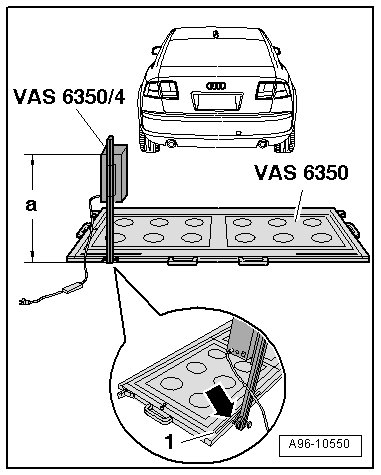
• When installed correctly, vehicle electrical system voltage line must be connected at bottom left of calibration device (as seen in direction of travel).
Dimension - a - is measured from upper edge of calibration device to the floor.
• SWA 1.0: dimension - a - = 800 mm.
• SWA 1.5: dimension - a - = 770 mm.
- The indicator on the base of the (VAS 6350/4) must align with setting on measurement scale - 1 - on measuring field - arrow -.
Vehicles with SWA1.0:
• Left setting = 679 mm (read on measurement scale - 1 -).
Vehicles with SWA1.5:
• Right setting = 790 mm (read on measurement scale - 1 -).
All Vehicles
- Connect (VAS 6350/4) to vehicle electrical system voltage.
- Bring (VAS 6350) into horizontal position by turning plastic base.
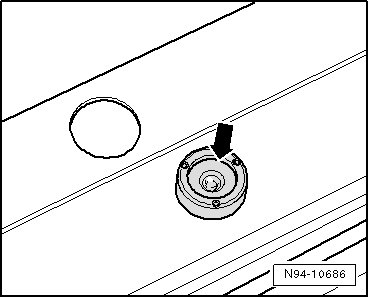
• Observe bubble level (sight glass) on (VAS 6350) - arrow -.
- Switch Line Laser (VAS 6350/3) on (VAS 6350) on.
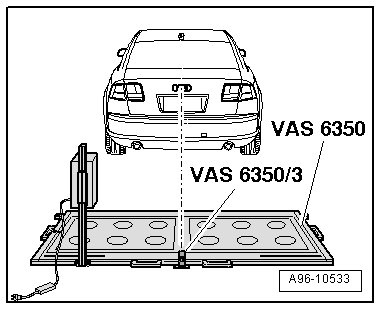
- Put on "Laser eye protection".
- Align the (VAS 6350) so the (VAS 6350/3) strikes the center of the brand emblem on the rear lid.
- Check left and right distance between catch bracket on (VAS 6350) and measuring paddle - 1 - on wheel sensors again.
• Specified value: 1700 ± 2 mm
Calibration Procedure
The following should not occur during the calibration procedure:
• Vehicle doors must not be opened or closed.
• People should not sit in the vehicle.
• People should not go between the vehicle and the (VAS 6350/4).
Procedure
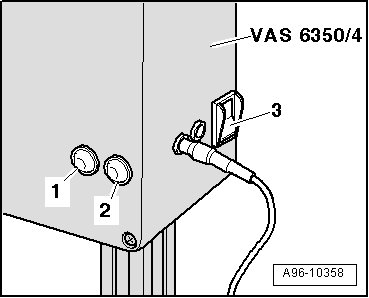
- Switch (VAS 6350/4) on at power switch - 3 -.
• The green LED - 1 - must lamp up.
• If the red LED - 2 - lamps up: Check (VAS 6350/4).
- Follow the instructions on the (VAS 5051B) display.
During the course of the program, a request is made to switch the (VAS 6350/4) from the left to the right side of the (VAS 6350).
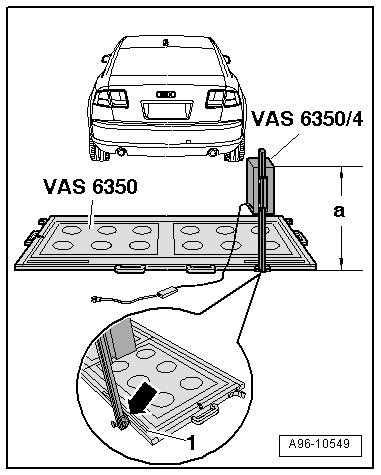
- Switch (VAS 6350/4) off and move device.
• When installed correctly, vehicle electrical system voltage line must be connected at bottom left of calibration device (as seen in direction of travel).
Dimension - a - is measured from upper edge of calibration device to the floor.
• SWA 1.0: dimension - a - = 800 mm.
• SWA 1.5: dimension - a - = 770 mm.
- The indicator on the base of the (VAS 6350/4) must align with setting on measurement scale - 1 - on measuring field - arrow -.
Vehicles with SWA1.0:
• Right setting = 679 mm (read on measurement scale - 1 -).
Vehicles with SWA1.5:
• Right setting = 790 mm (read on measurement scale - 1 -).
All Vehicles
- Switch (VAS 6350/4) on at power switch - 3 -.
• The green LED - 1 - must lamp up.
- Follow the instructions on the (VAS 5051B) display.
- After calibrating the lane change assistance successfully, end "calibration", switch off the ignition and disconnect the diagnostic connector.